前言:
注:本文主要是安装 InformationServer11.1.3.1安装配置,InforSphere DataStage 是 InforSphere Information Server 中重要的组成部分。
以下内容为最近在自己电脑测试安装,由于硬件资源有限故把Oracle 和Datastage 都放在同一个服务器上。默认资料库安装为DB2,我这边选定Oracle 为存储元数据库。另外Oracle Server端安装和建库已经提前完成。
操作系统:Oracle Enterprise Linux 64位
硬件:X86_64/8G

1.1 系统要求
InfoSphere Information Server的系统要求不同的基于系统的范围和规模。具体配置您需要支持环境具有令人满意的性能取决于多种因素,如服务器速度、内存、磁盘I /O,数据量和网络和服务器工作负载。运营性需求明显大于这些最小安装磁盘空间需求。
基于各个系统版本不同 对于服务层,引擎层基于元数据存储 硬盘和内容具体需要可以参考IBM 官方详细的系统要求:
Detailed System Requirements
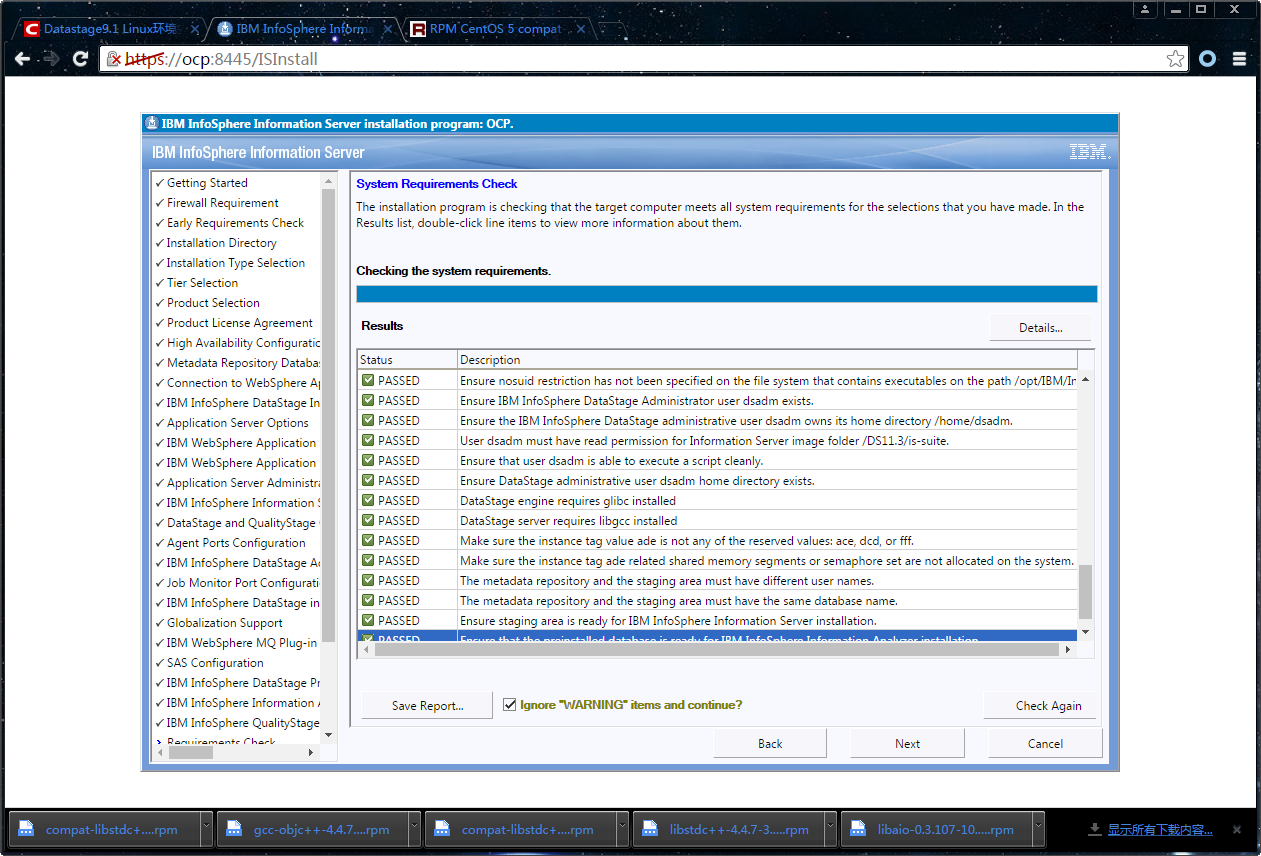
以下rpm软件包需要提前安装,否则会在安装中出错。
The following packages are required to install and operate Version 11.3 on 64-bit Red Hat Enterprise Linux

glibc-2.12-1.107.el6.x86_64

libXp-1.0.0-15.1.el6.x86_64

libXau-1.0.5-1.el6.x86_64

libXext-1.1-3.el6.x86_64

libX11-1.3-2.el6.x86_64

libxcb-1.5-1.el6.x86_64

libXmu-1.0.5-1.el6.x86_64

nss-softokn-freebl-3.14.3-9.el6.x86_64

pam-1.1.1-4.el6_0.1.x86_64

libaio-0.3.107-10.el6.x86_64

libstdc++-4.4.7-3.el6.x86_64

compat-libstdc++-33-3.2.3-69.el6.x86_64

libgcc-4.4.7-3.el6.x86_64
2.2 安装步骤
1.1 数据库安装
- 2.2.1 数据库安装
Oracle Server端安装: 实施步骤略
- 2.2.2 建库
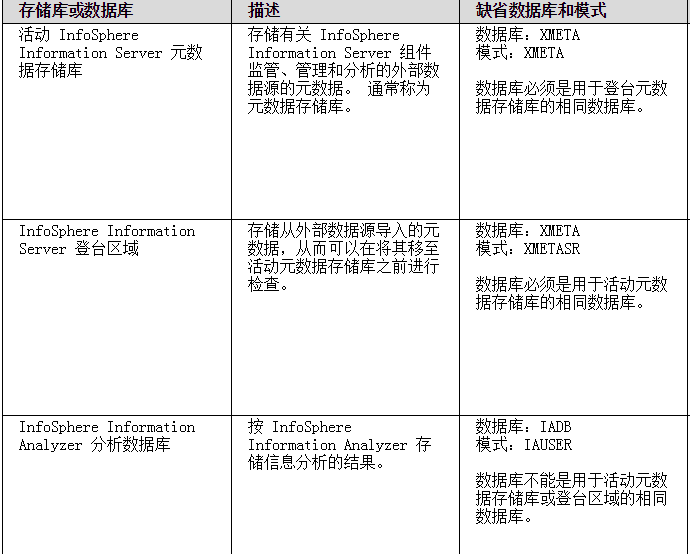
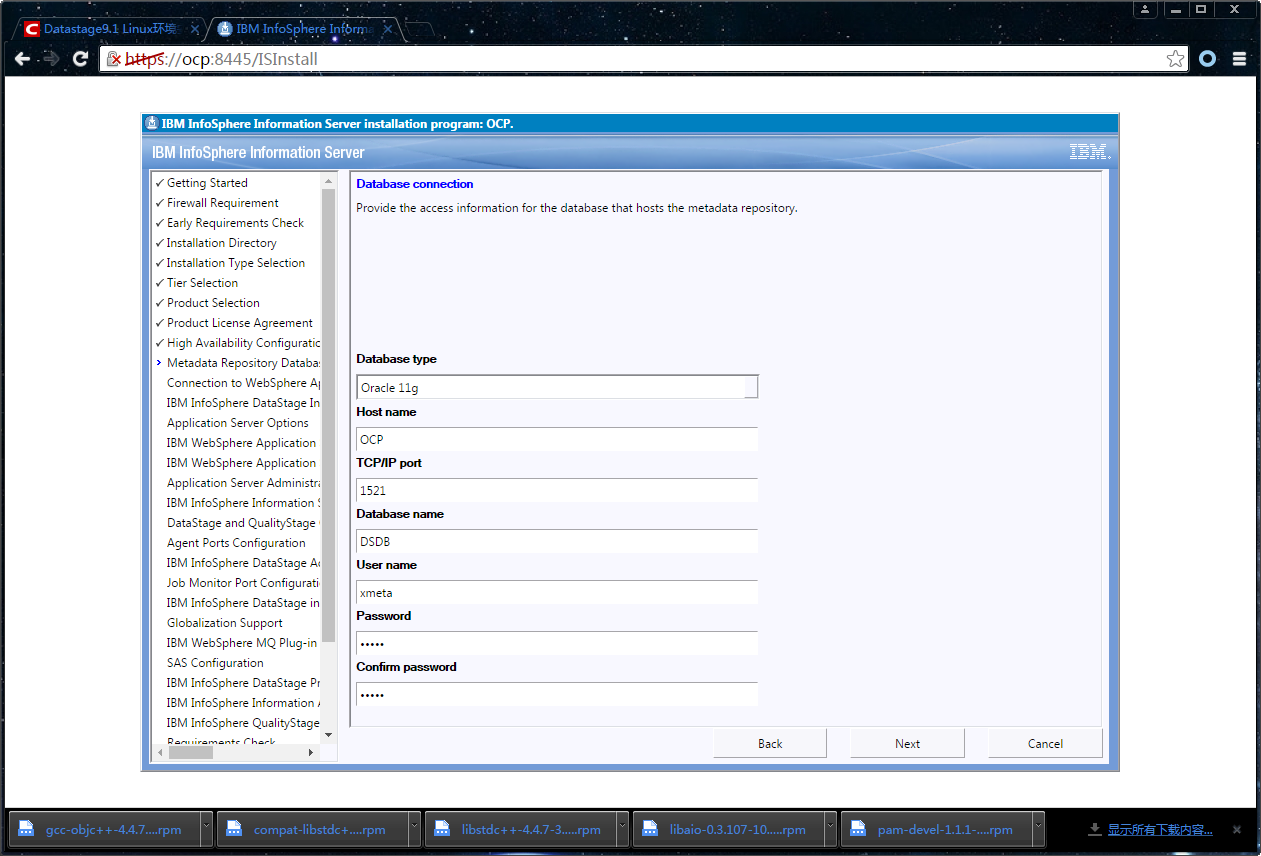
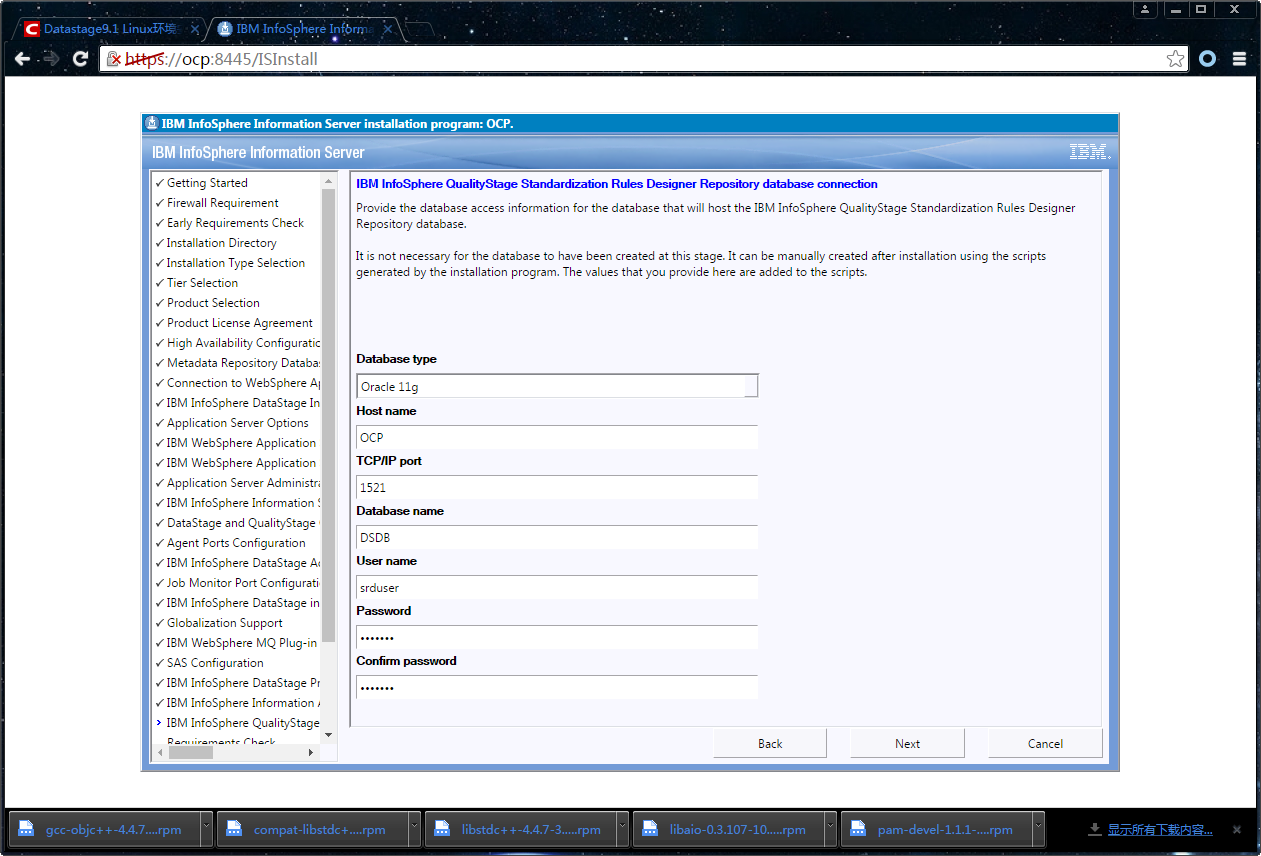
数据库名:DSDB
- 2.2.3资料库创建
创建表空间,创建用户并指定表空间,授权。
[oracle@OCP Oracle11g]$ pwd
/home/oracle/Metebase/MetadataRepository/Oracle11g
[oracle@OCP Oracle11g]$ ./create_xmeta_db.sh sys manager DSDB xmeta xmeta xmetaspace /s01/oradata/DSDB/datafile
Checking Required files....
setting datafile path ...
The IBM Information Server metadata repository database will be created:
Oracle SID : DSDB
Tablespace : xmetaspace
Schema name : xmeta
Data file : /s01/oradata/DSDB/datafile/xmetaspace.dbf
Press [CTRL/C]; to abort or [ENTER] to continue
Creating tablespace .....
Tablespace created successfully
Modifying DB config
Database configuration modified successfully
Creating metadata repository user .....
User created successfully
./create_xmeta_db.sh completed
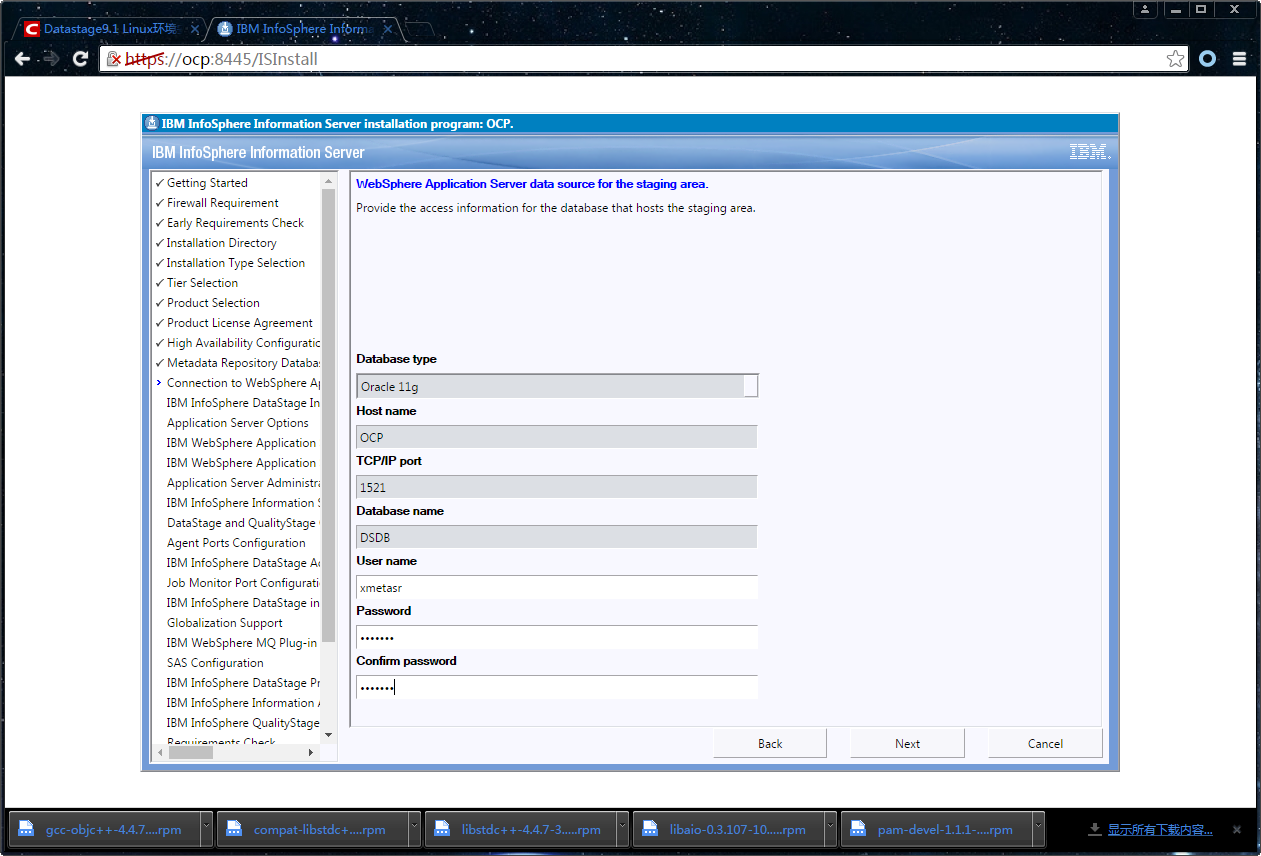
[oracle@OCP Oracle11g]$ ./create_xmeta_db.sh sys manager DSDB xmetasr xmetasr xmetasrsp /s01/oradata/DSDB/datafile
Checking Required files....
setting datafile path ...
The IBM Information Server metadata repository database will be created:
Oracle SID : DSDB
Tablespace : xmetasrsp
Schema name : xmetasr
Data file : /s01/oradata/DSDB/datafile/xmetasrsp.dbf
Press [CTRL/C]; to abort or [ENTER] to continue
Creating tablespace .....
Tablespace created successfully
Modifying DB config
Database configuration modified successfully
Creating metadata repository user .....
User created successfully
./create_xmeta_db.sh completed
[oracle@OCP Oracle11g]$
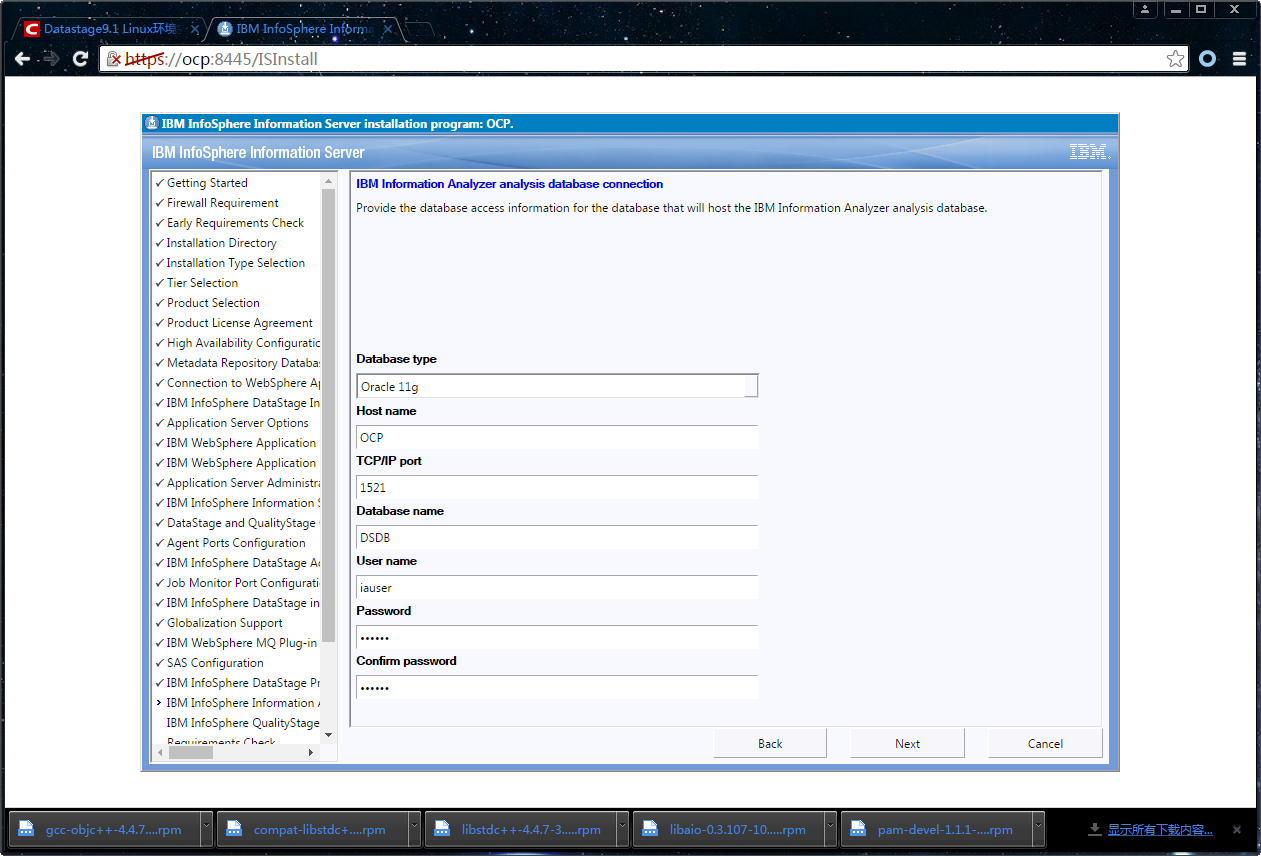
[oracle@dwdb Oracle]$ ./create_ia_db.sh system manager DSDB iauser iauser iaspace /s01/oradata/DSDB/datafile;
Checking Required files....
setting datafile path ...
The IBM InfoSphere Information Analyzer analysis database will be created:
Oracle SID : DSDB
Tablespace : iaspace
Schema name : iauser
Data file : /s01/oradata/DWDB/datafile/iaspace.dbf
Press [CTRL/C]; to abort or [ENTER] to continue
Creating tablespace .....
Tablespace created successfully
Creating user .....
User created successfully
create_ia_db.sh completed
[oracle@dwdb Oracle]$
===================================================如果不用SH脚本来创建,也可以自己写脚本如下=====================================================
--创建表空间
CREATE TABLESPACE xmetaspace LOGGING DATAFILE '/s01/database/DSDB/datafile/xmetaspace.dbf' SIZE 1024M AUTOEXTEND ON NEXT 2048m EXTENT MANAGEMENT LOCAL ONLINE SEGMENT SPACE MANAGEMENT AUTO;
CREATE TABLESPACE xmetasrsp LOGGING DATAFILE '/s01/database/DSDB/datafile/xmetasrsp.dbf' SIZE 1024M AUTOEXTEND ON NEXT 2048m EXTENT MANAGEMENT LOCAL ONLINE SEGMENT SPACE MANAGEMENT AUTO;
CREATE TABLESPACE iaspace LOGGING DATAFILE '/s01/database/DSDB/datafile/iaspace.dbf' SIZE 1024M AUTOEXTEND ON NEXT 2048m EXTENT MANAGEMENT LOCAL ONLINE SEGMENT SPACE MANAGEMENT AUTO;
--创建用户并指定表空间
create user xmeta identified by xmeta default tablespace xmetaspace;
create user xmetasr identified by xmetasr default tablespace xmetasrsp;
create user iauser identified by iauser default tablespace iaspace;
--授权
grant resource,connect,dba to xmeta;
grant resource,connect,dba to xmetasr;
grant resource,connect,dba to iauser;
2.2 安装文件说明
- 1 安装文件
IS_11.3.1.1_LIN_86_ML.tar.gz
tar -xvf IS_11.3.1.1_LIN_86_ML.tar.gz
- 2 许可文件 ,解压到与安装文件同一目录下
INFO_IS_11.3.1.1_BSF_ML.zip
unzip INFO_IS_11.3.1.1_BSF_ML.zip -d is_suite/
3.3 安装步骤说明
- 1配置操作系统内核参数
kernel.sem:

$ echo '250 128000 32 1024'>/proc/sys/kernel/sem

$ vi /etc/sysctl.conf

添加行:

kernel.sem =250 128000 32 1024
- 2确认gcc编译器
rpm –qa |grep c++

rpm –qa |grep c

注意:提前安装c++编译器,虽然安装过程不会报错,但是后去组件使用会出现问题
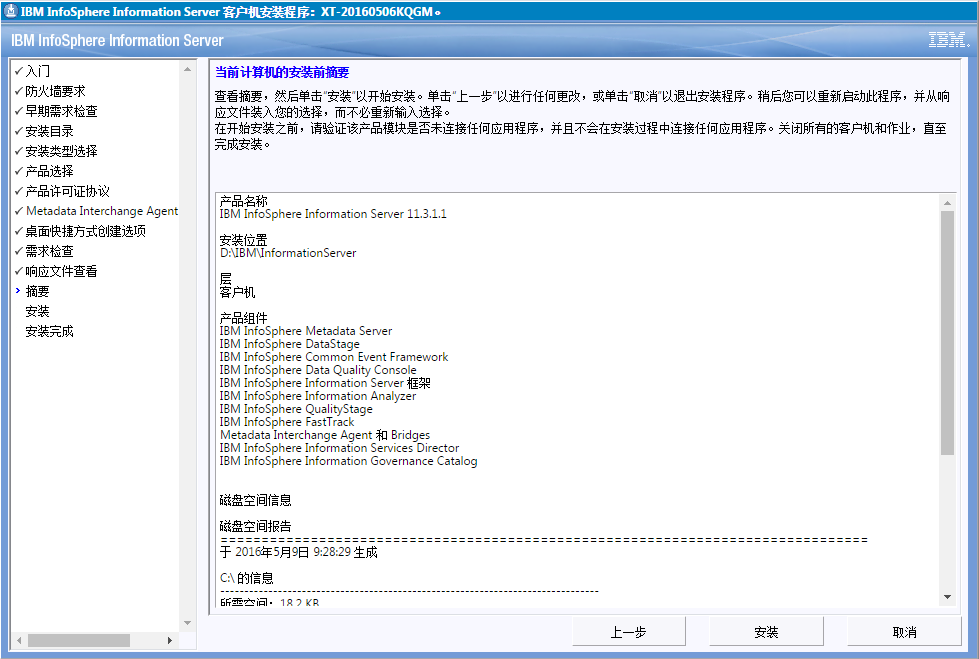
- 3 安装过程
cd /DS11.3/is-suite

./setup
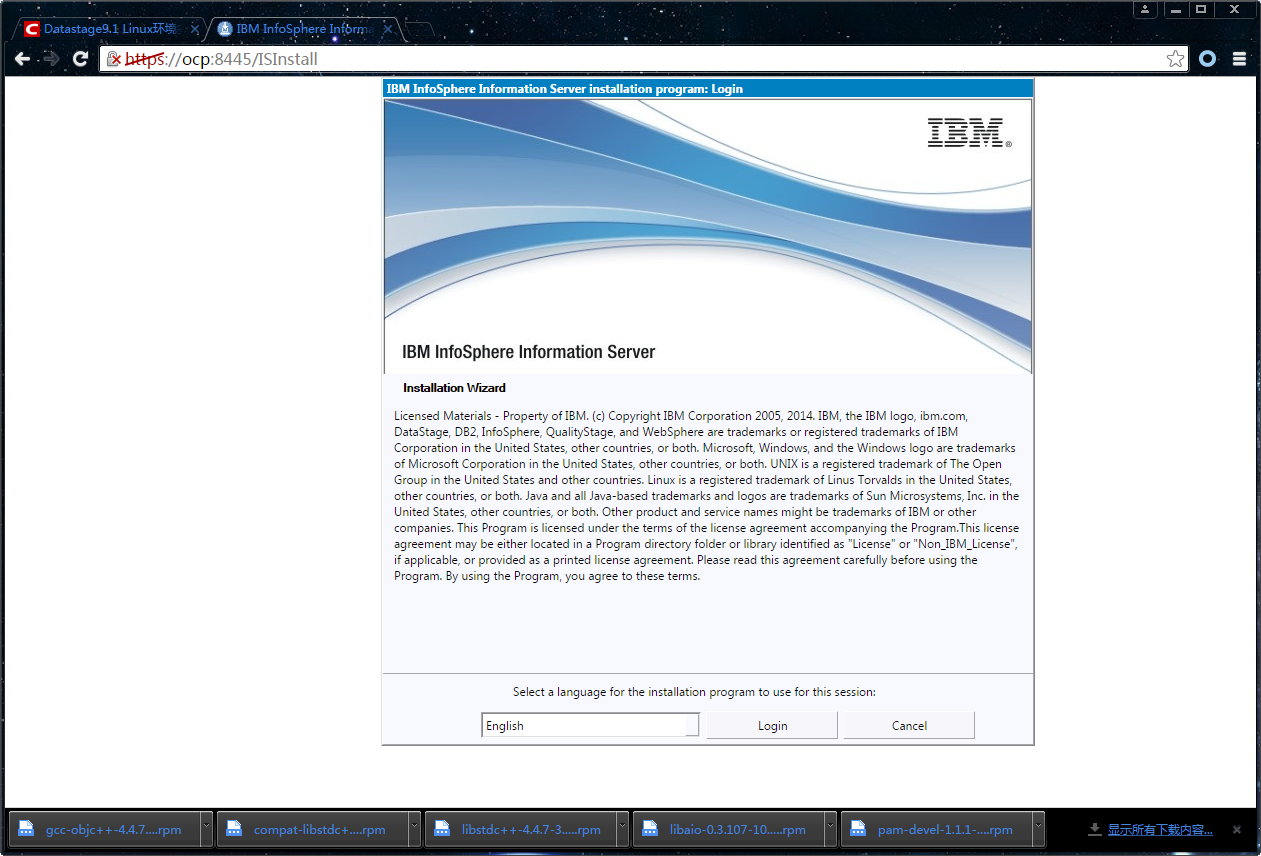
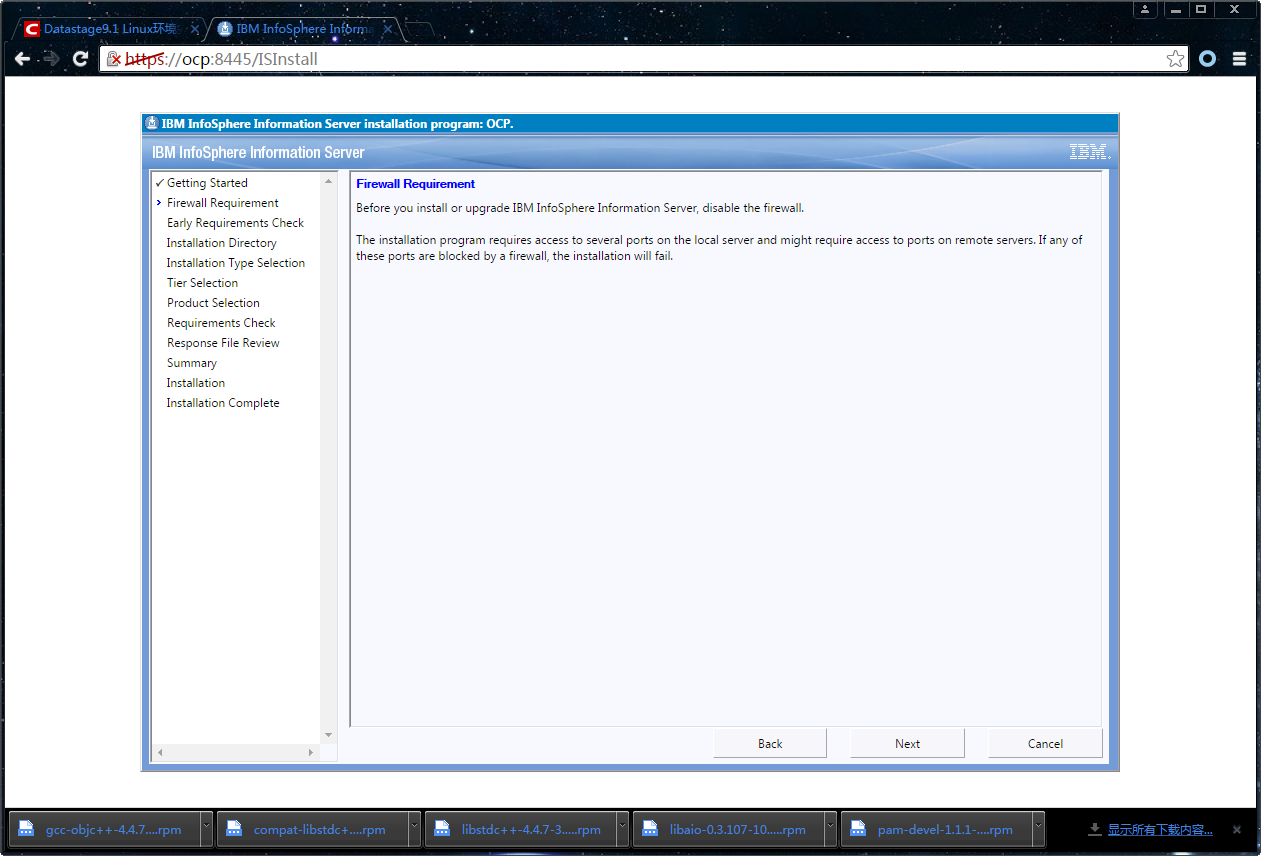
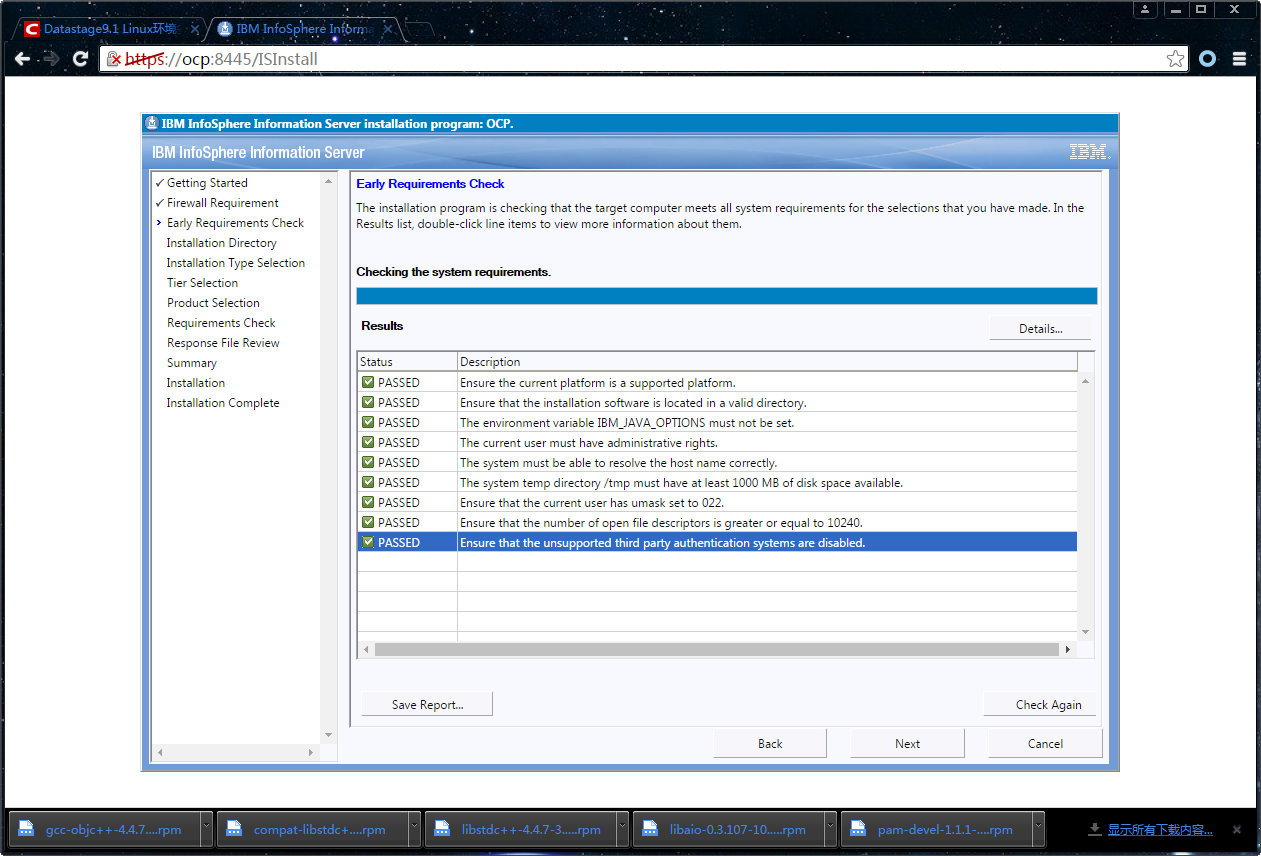
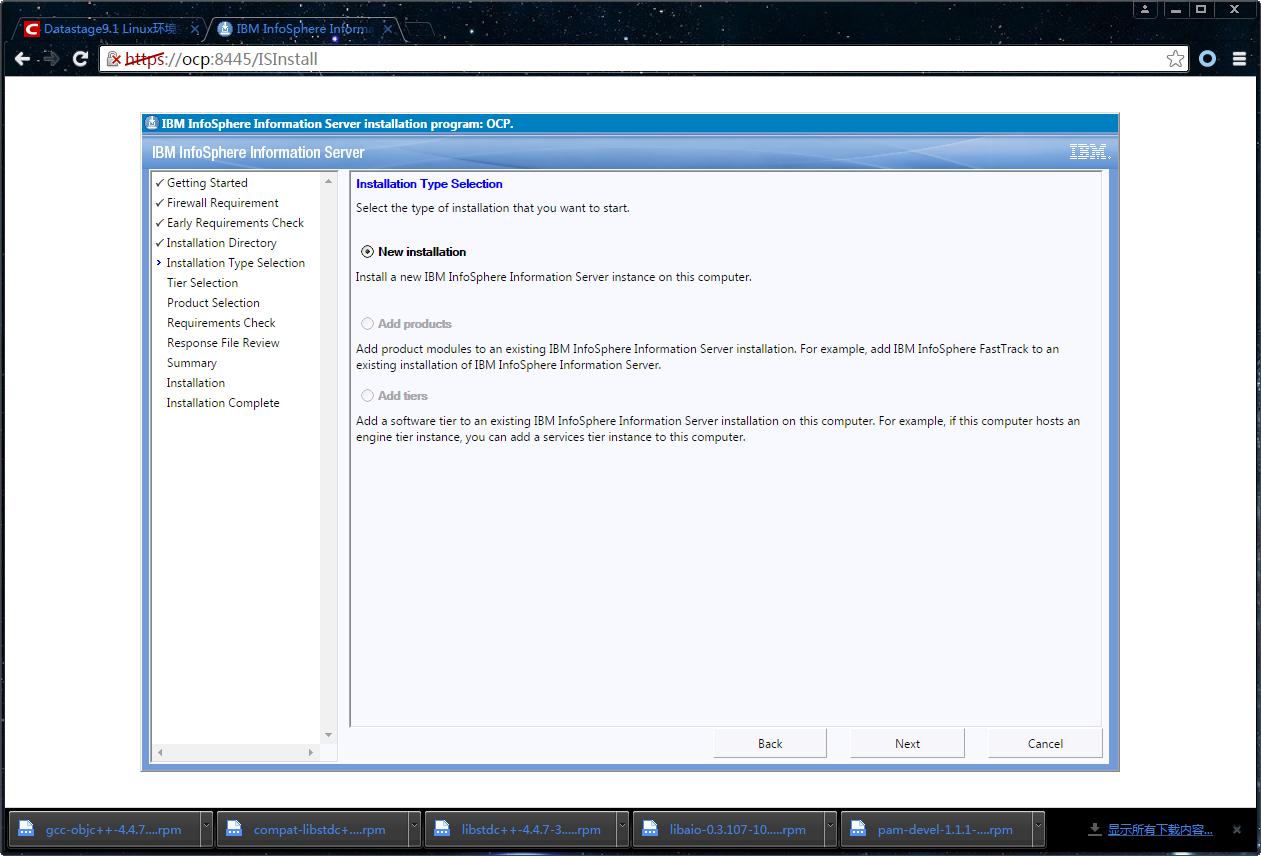
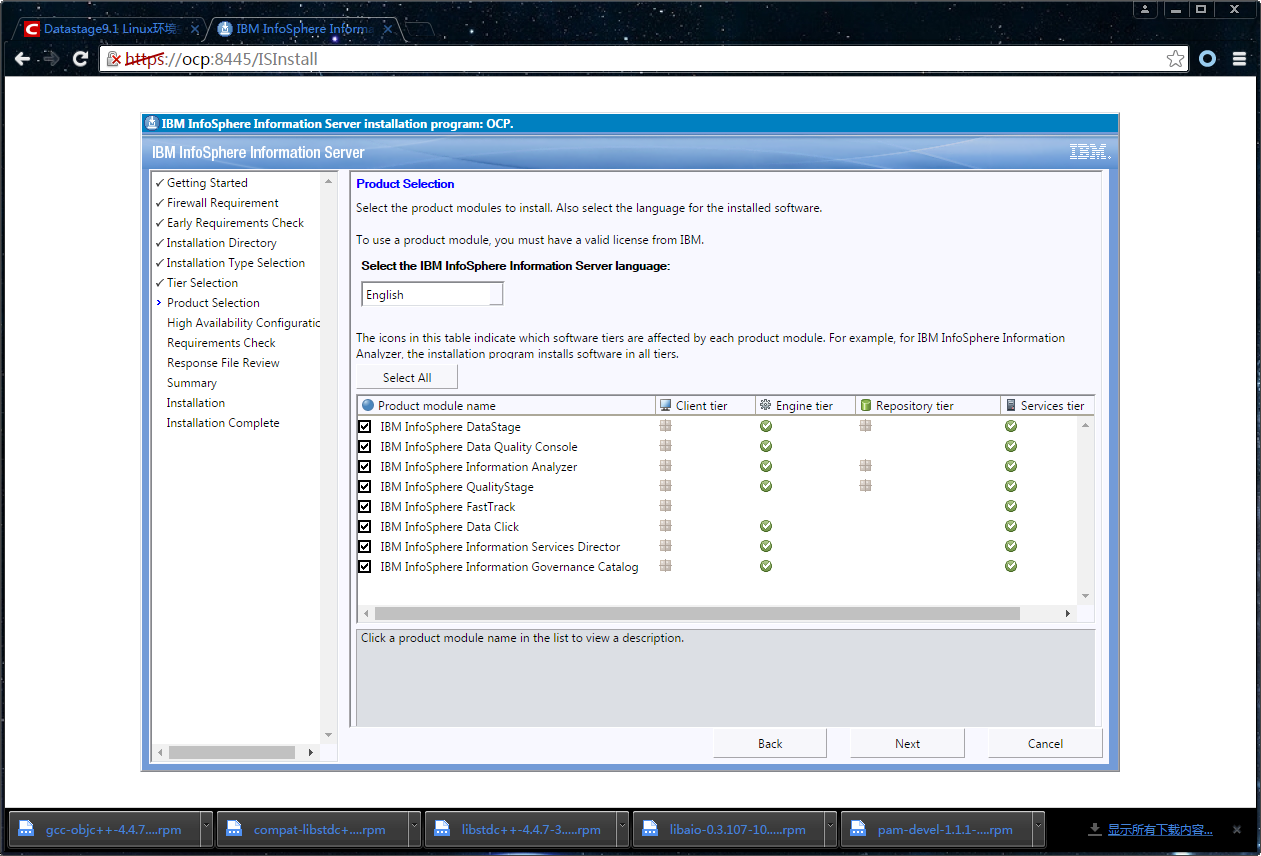
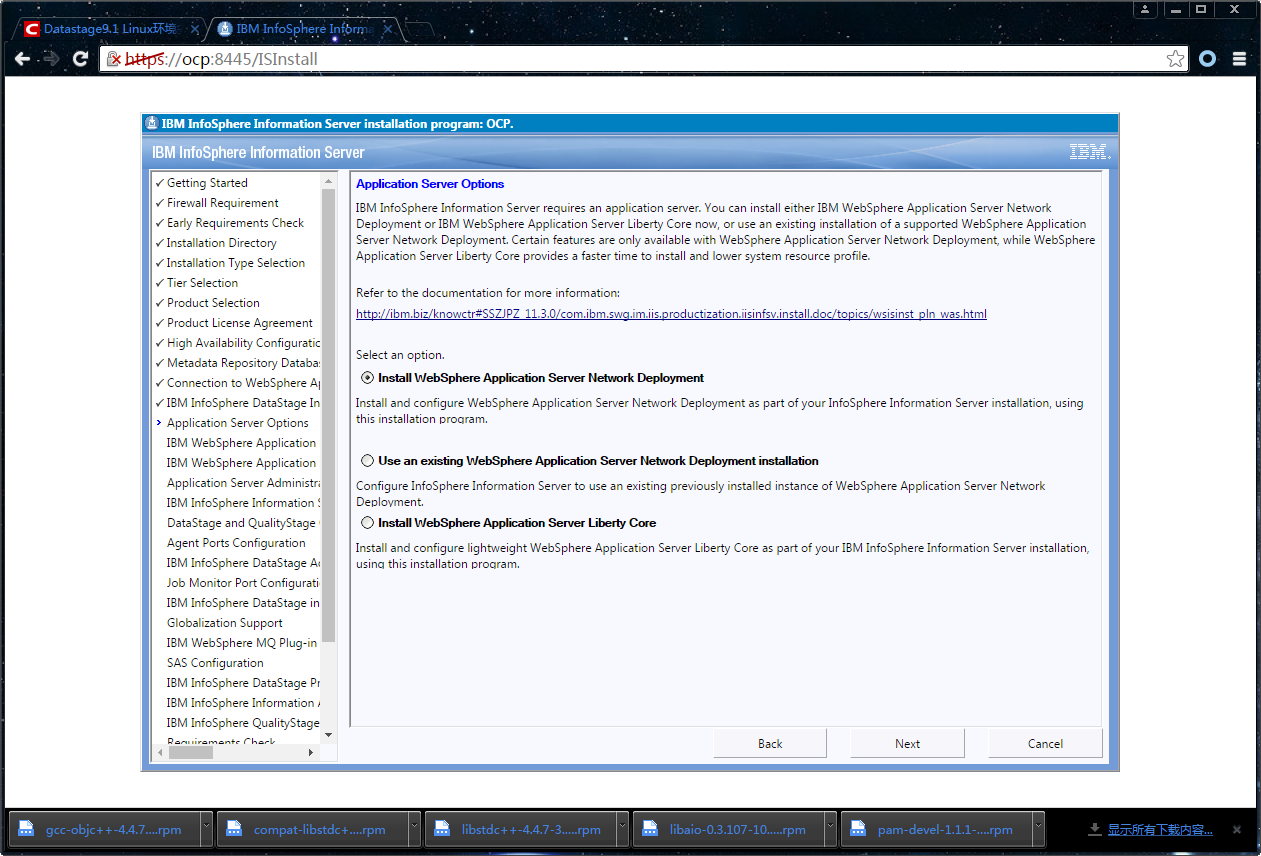
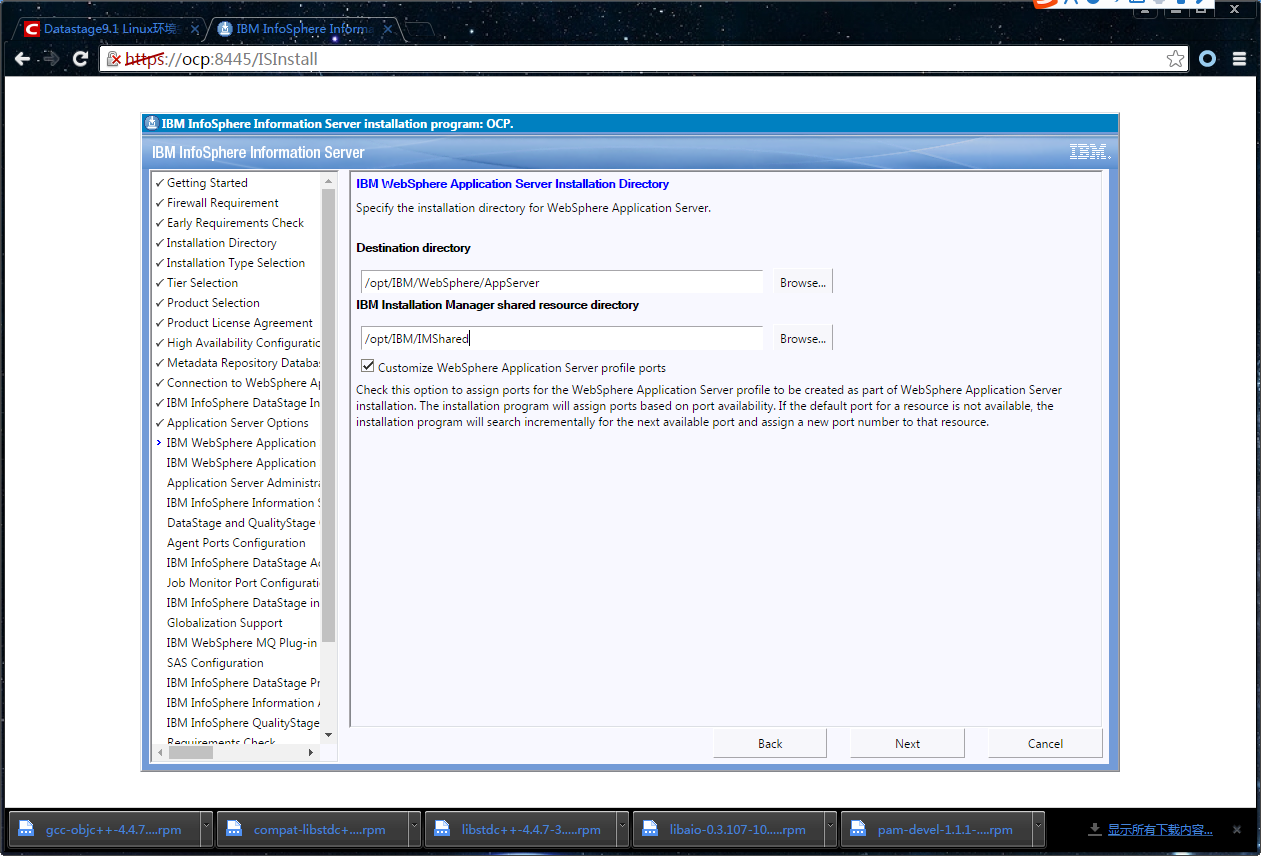
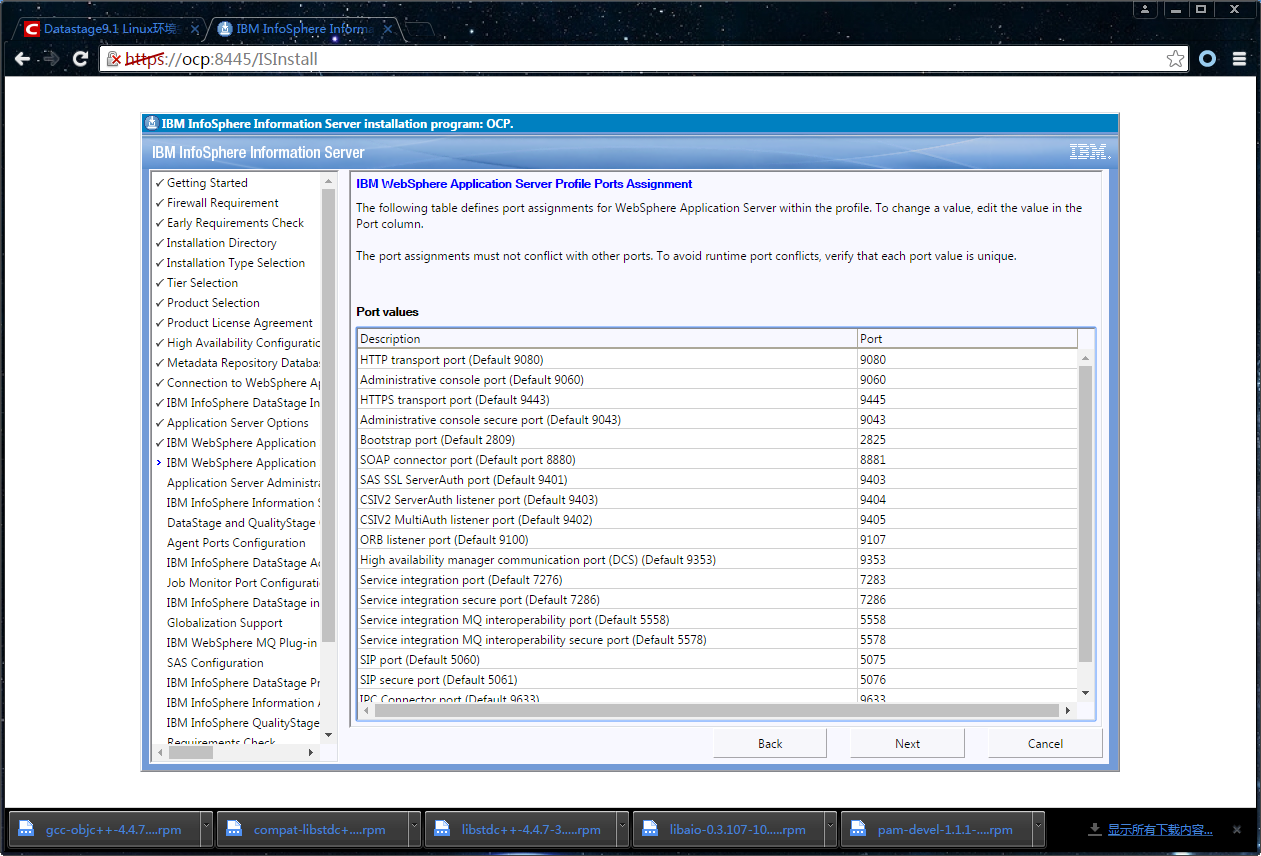
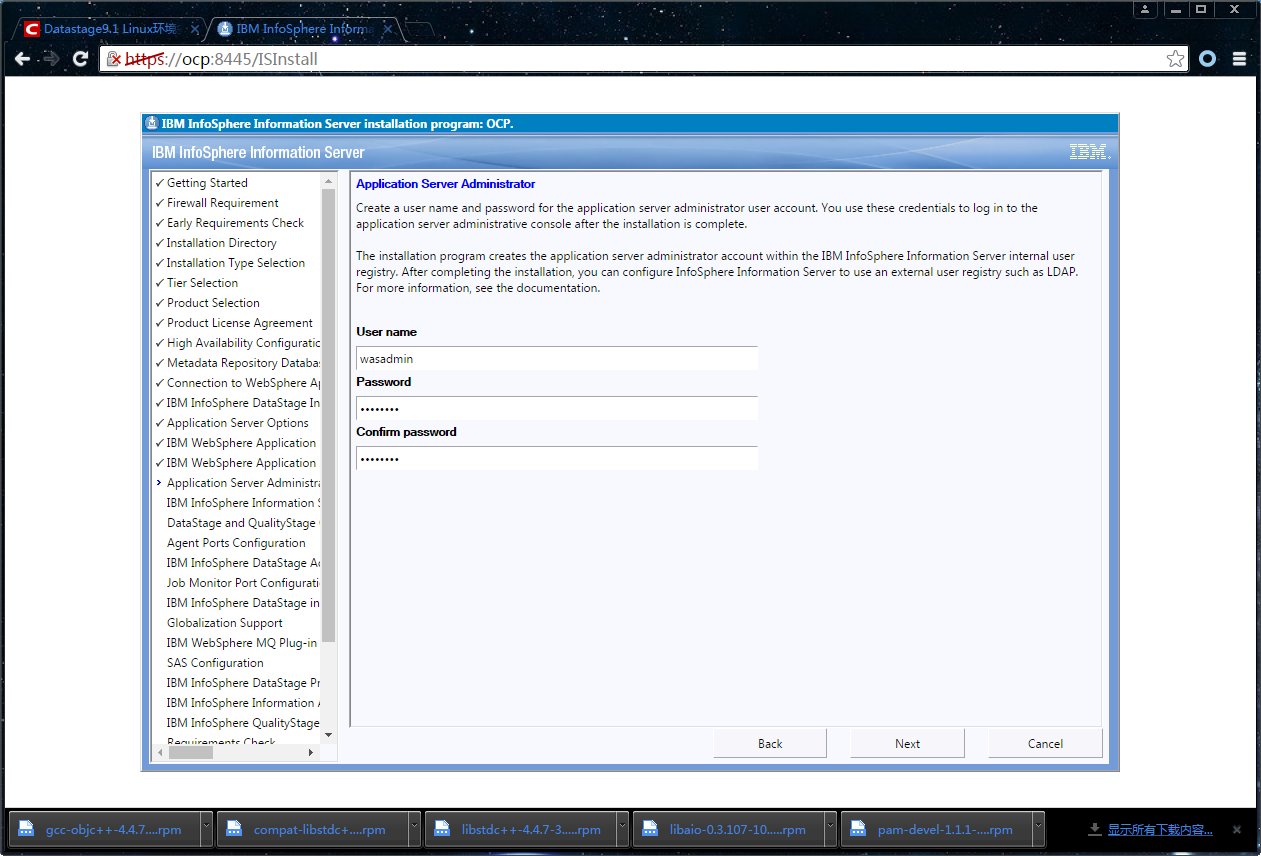
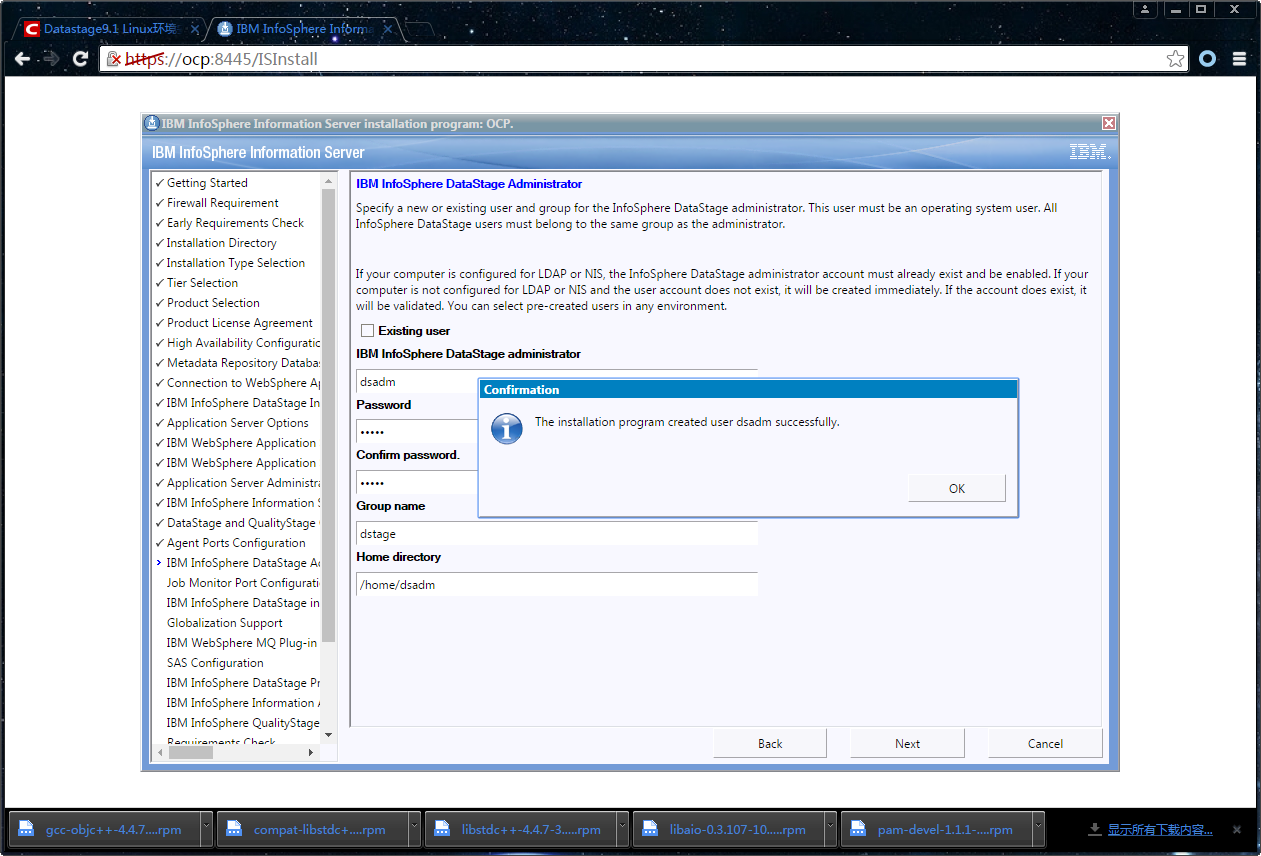
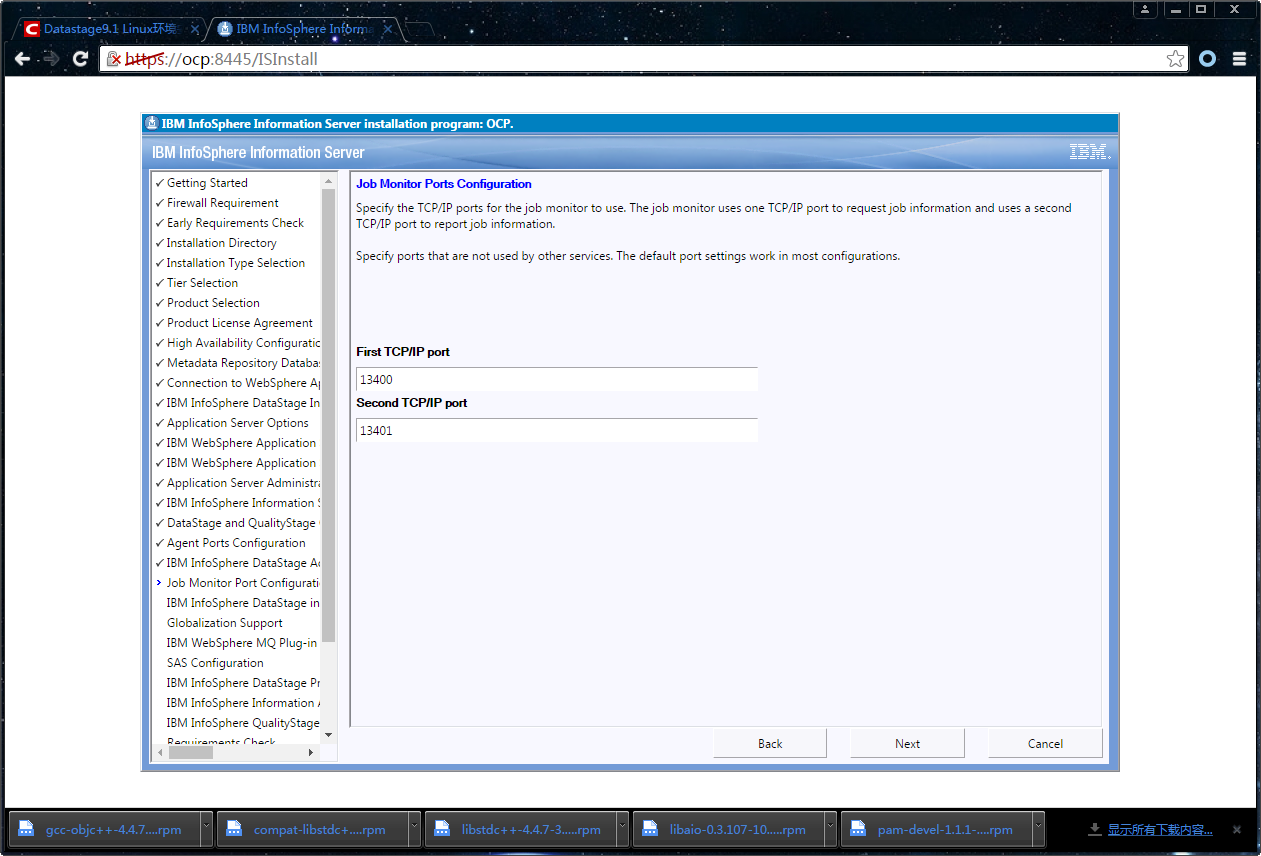
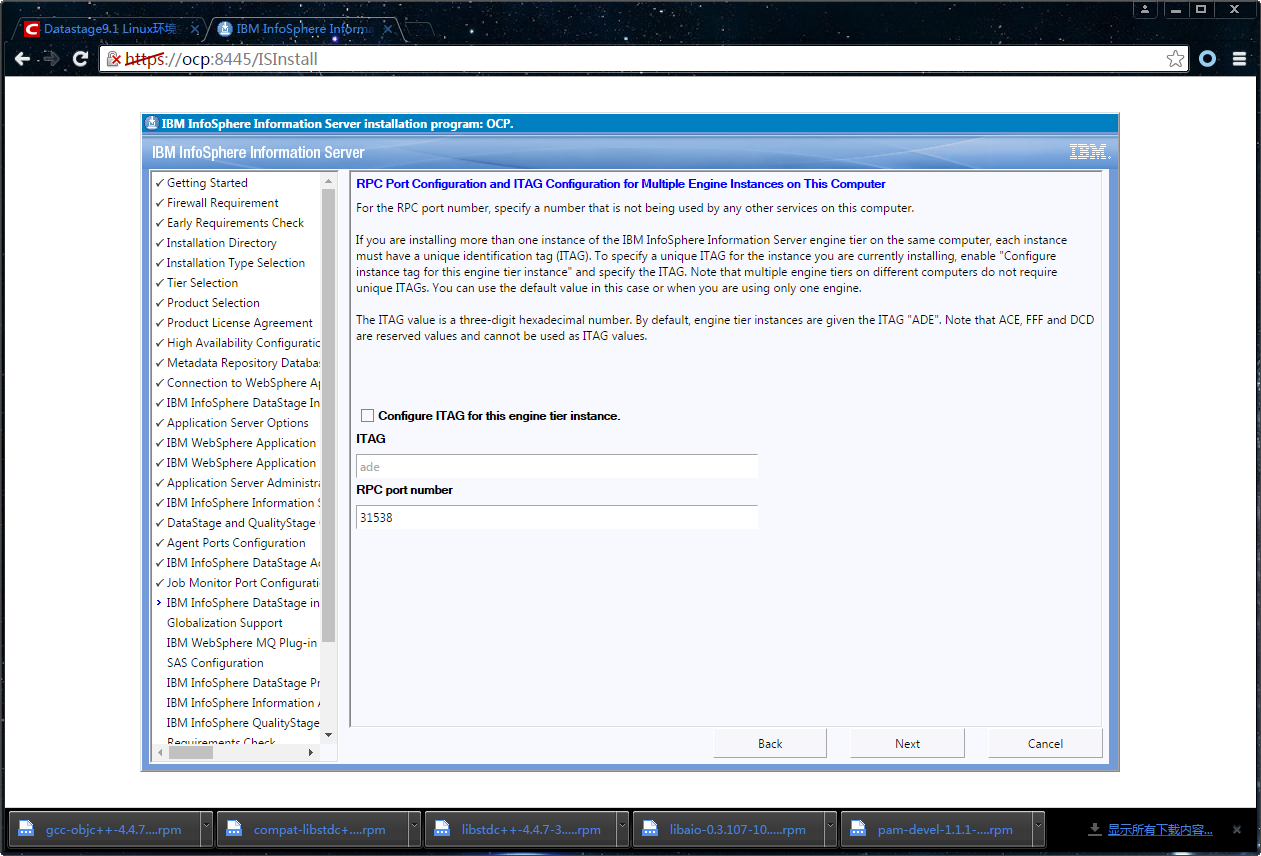
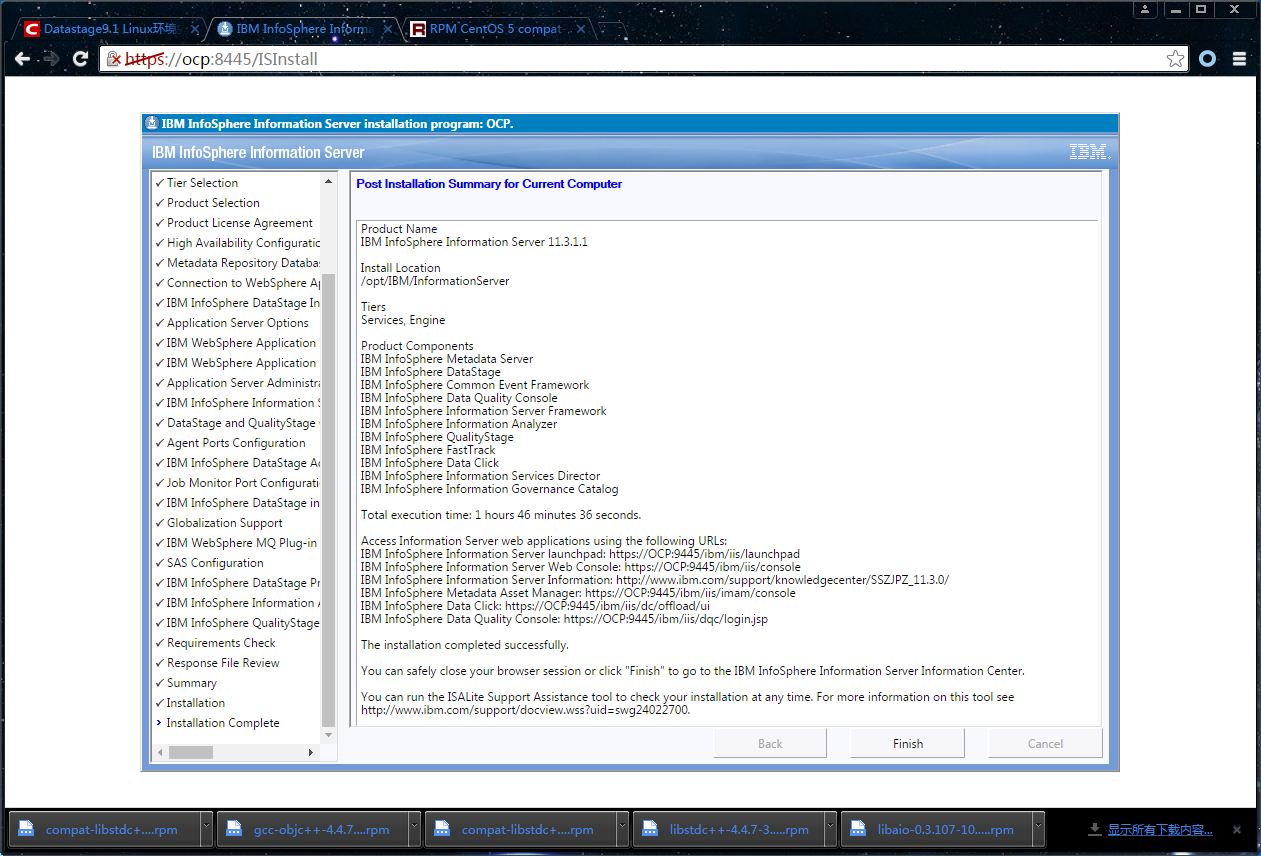
- 4在浏览器中安装
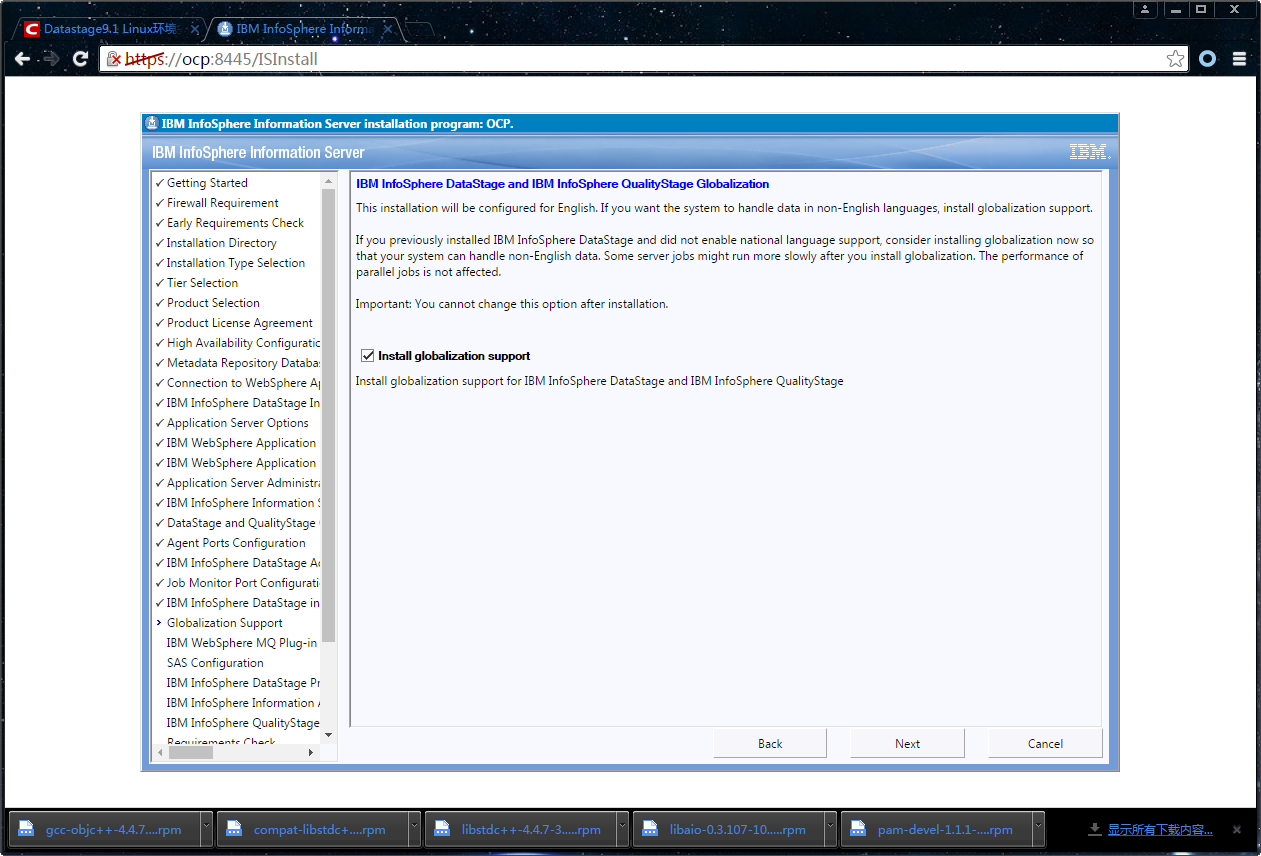
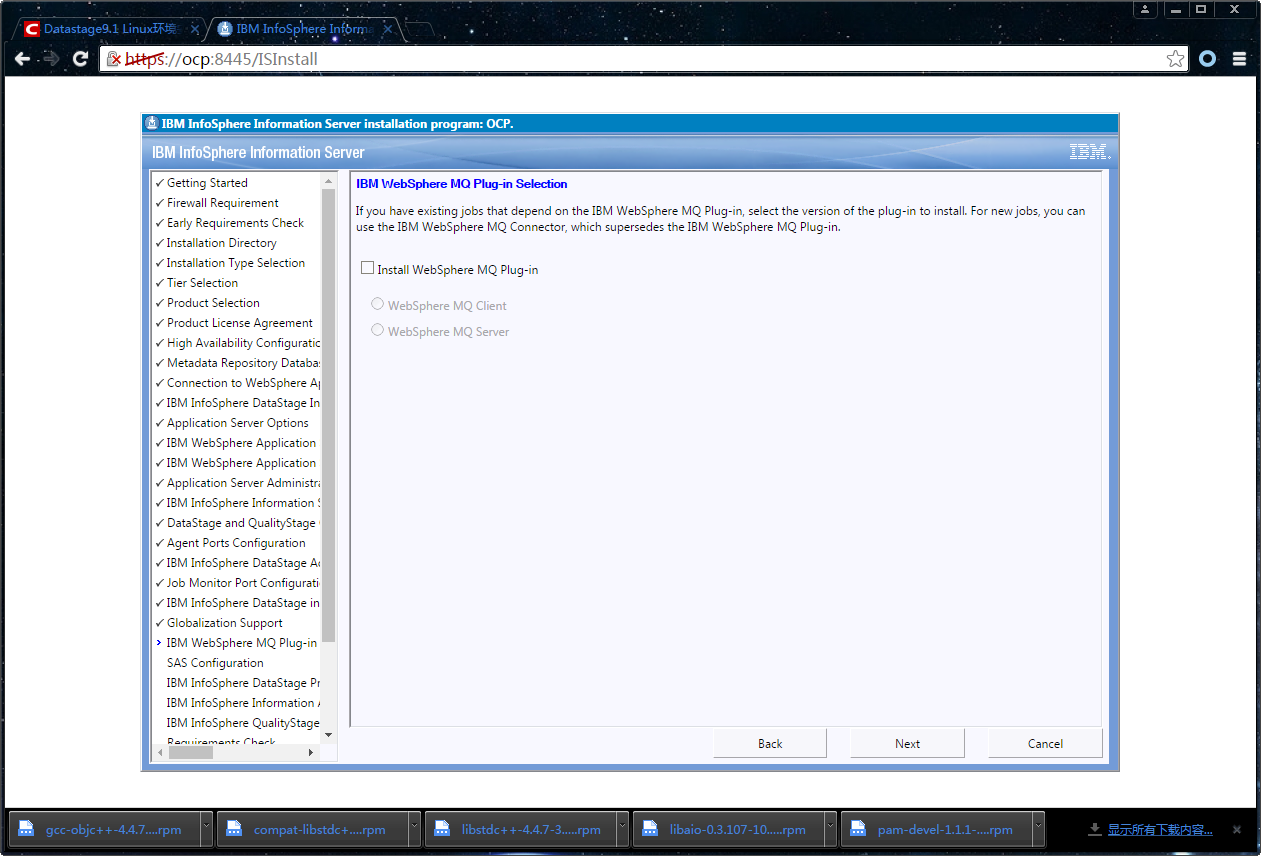
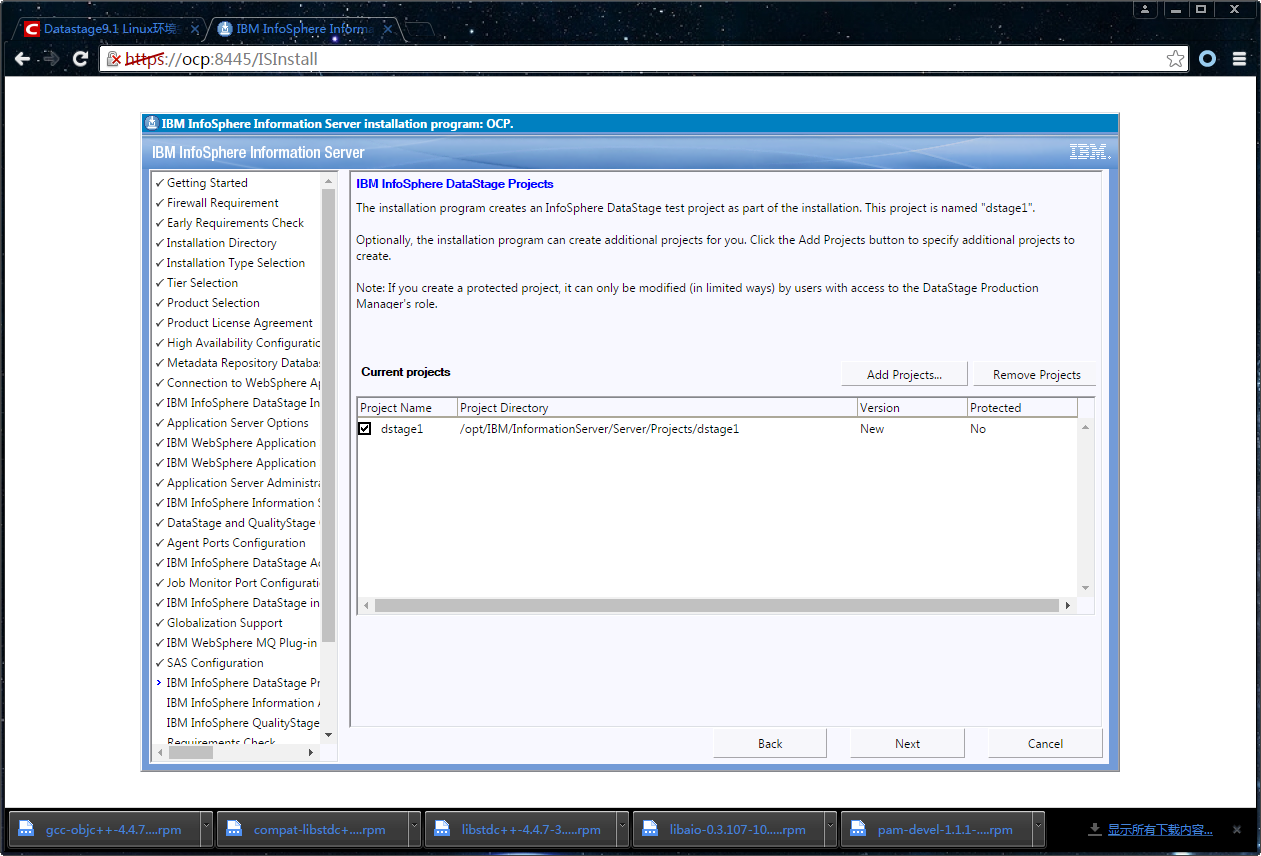
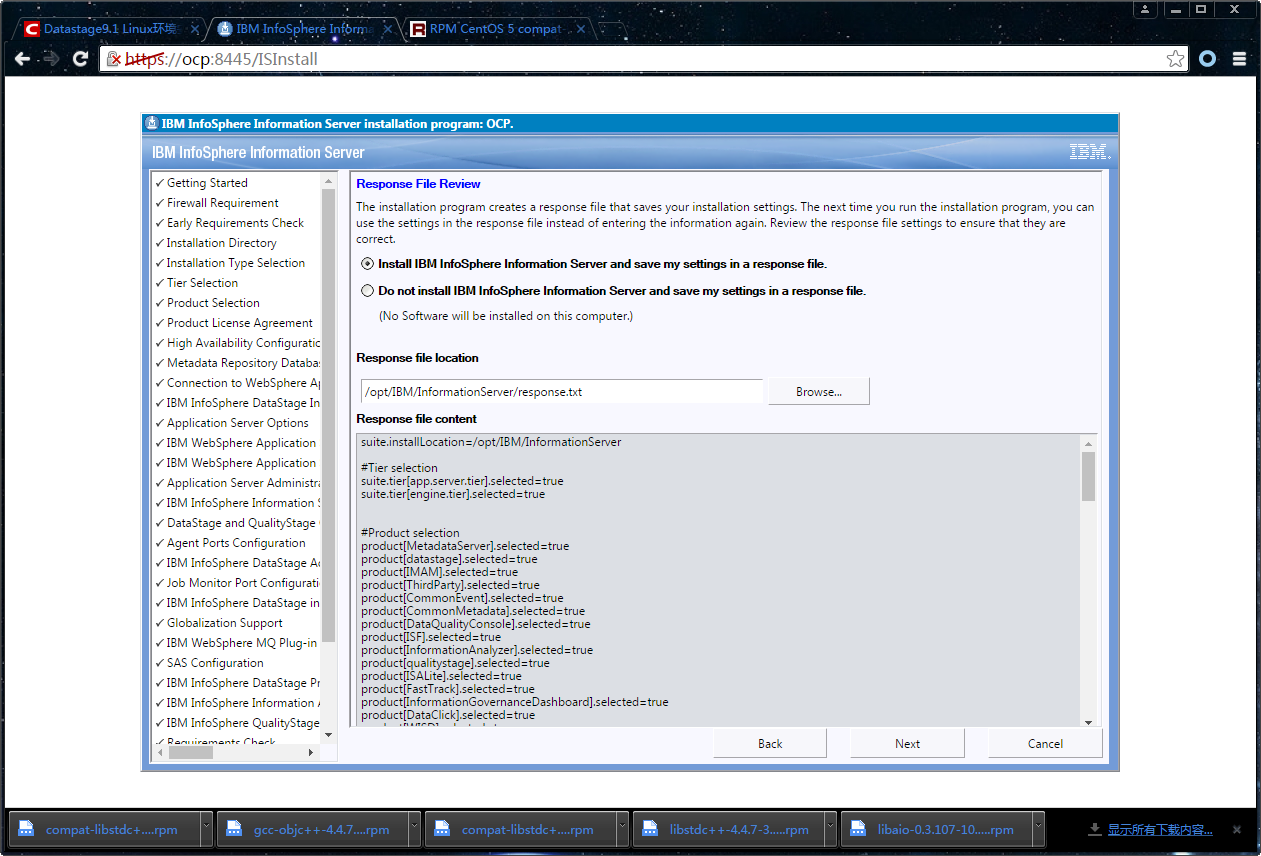
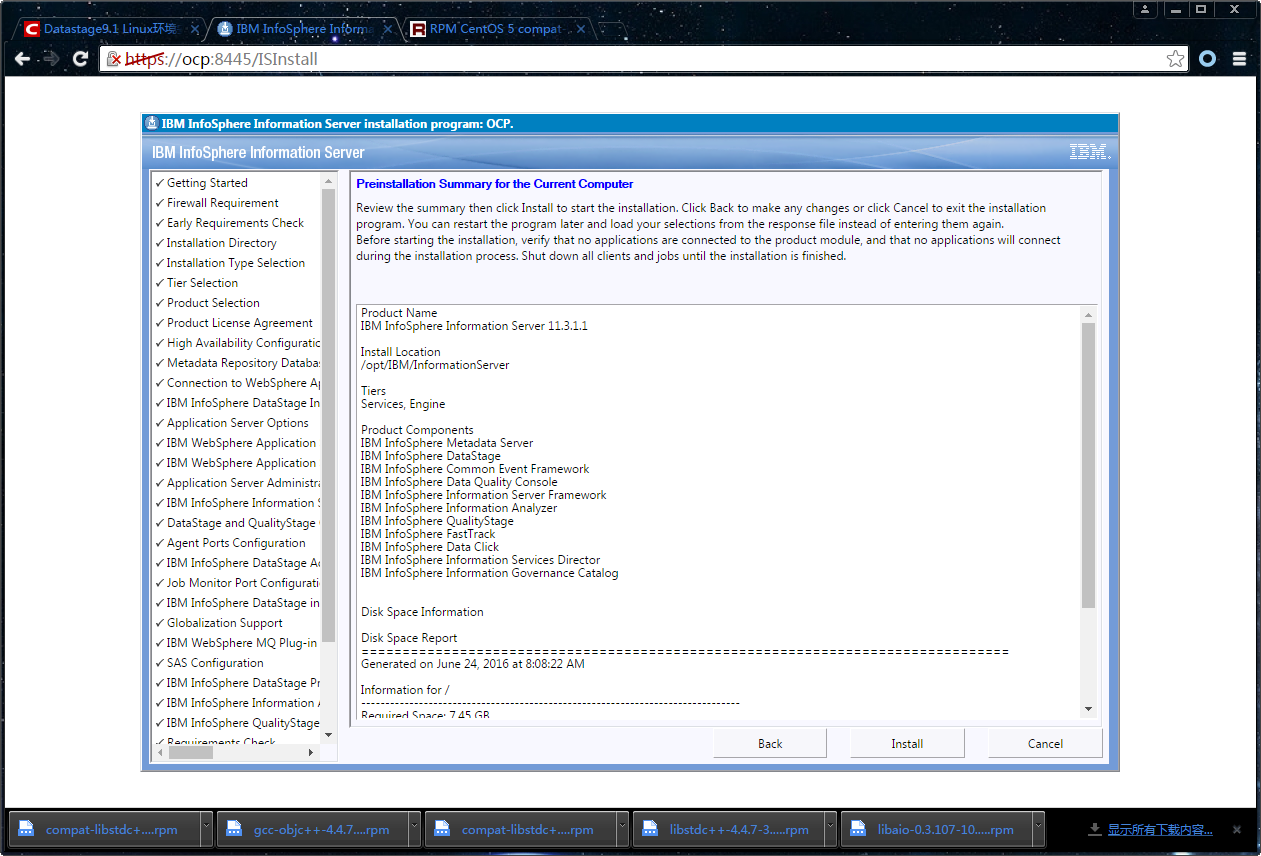
https://OCP:8445/ISInstall
- 1
- 2

- 3
- 4
- 5

- 6
- 7

- 8
- 9

- 10

- 11
- 12
- 13

- 14
- 15
- 16
- 17
- 18

- 19
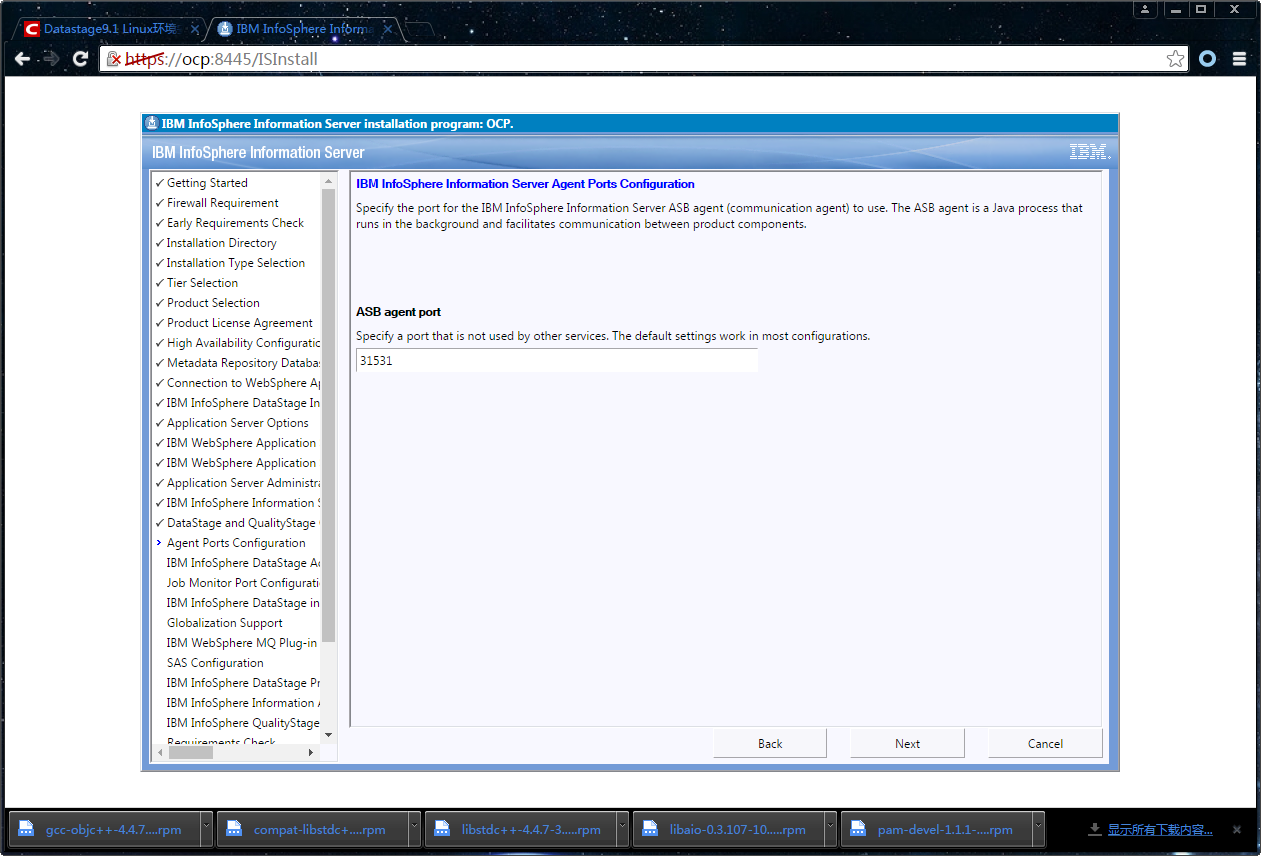
- 20
- 21
- 22
- 23
- 24
- 25

- 26
- 27
- 28
- 29
- 30
- 31
- 32
3.3 配置
1.1 安装Oracle 客户端
步骤略
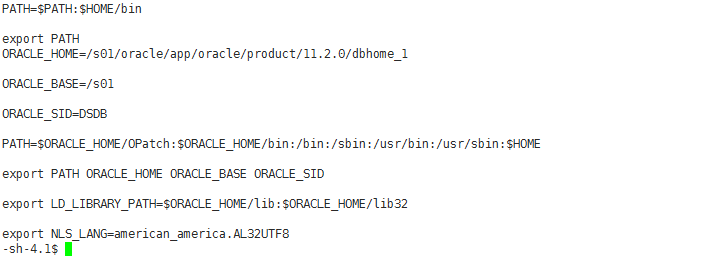
2.2 dsadm用户环境变量设置
- 1修改dsadm用户的.profile文件,加入以下内容
########################################


./opt/IBM/InformationServer/Server/DSEngine/dsenv
3.3 修改dsenv
dsadm修改
/opt/IBM/InformationServer/Server/DSEngine/dsenv


修改dsenv文件,


用vi编辑$DSHOME/dsenv
在其中加入以下内容
4.4 添加用户凭证
安装结束后需要在服务端做相应用户、组及登陆凭证配置,客户端才可以登录。
登陆IBMInformation Server Web 控制台打开IBMInformation Server Web 控制台,输入IBM Information Server服务管理员用户名isadmin及密码isadmin登陆。
http://OCP:9080/ibm/iis/console

- b) 添加管理用户和组单击“管理”按钮,展开管理界面。单击“用户和组”-“组”展开组管理界面。

单击右侧的“新建组”,输入新建组信息,分配权限(这里我们创建一个管理组admin,分配所有的权限),记得单击页面右下角的保存并关闭,重新打开组页面,则可以看到我们新建的组已经存在了。
单击“用户和组”-“用户”展开用户管理界面。安装过程中我们已经默认添加了IBM Information Server用户和websphere两个用户。选中admin账户,点击右侧打开用户,这里可以查看admin账户信息、分配的权限,我们将admin账户添加到admin组中去。单据“组”框下方的浏览按钮,选中我们刚才建立 的组admin。记得点击窗口下方的“确定”按钮,还有“用户”窗口下方的“保存并关闭”按钮。
输入要用来连接 IBM Information Server 引擎的用户名和密码。您提供的用户名和密码必须是安装引擎层的操作系统的有效用户名和密码。
单击“域管理”-“DataStage凭证”,选中安装了IBM Information Server服务的计算机名“central-zzp”,单击“打开我的凭证”。

- d)然后在DataStage凭证页面输入操作系统的用户名和密码,保存并关闭。


“打开用户凭证”里面就添加了admin的凭证,如果除了admin以外还需要配置有多个用户的,每个用户都要在这里面添加凭证。
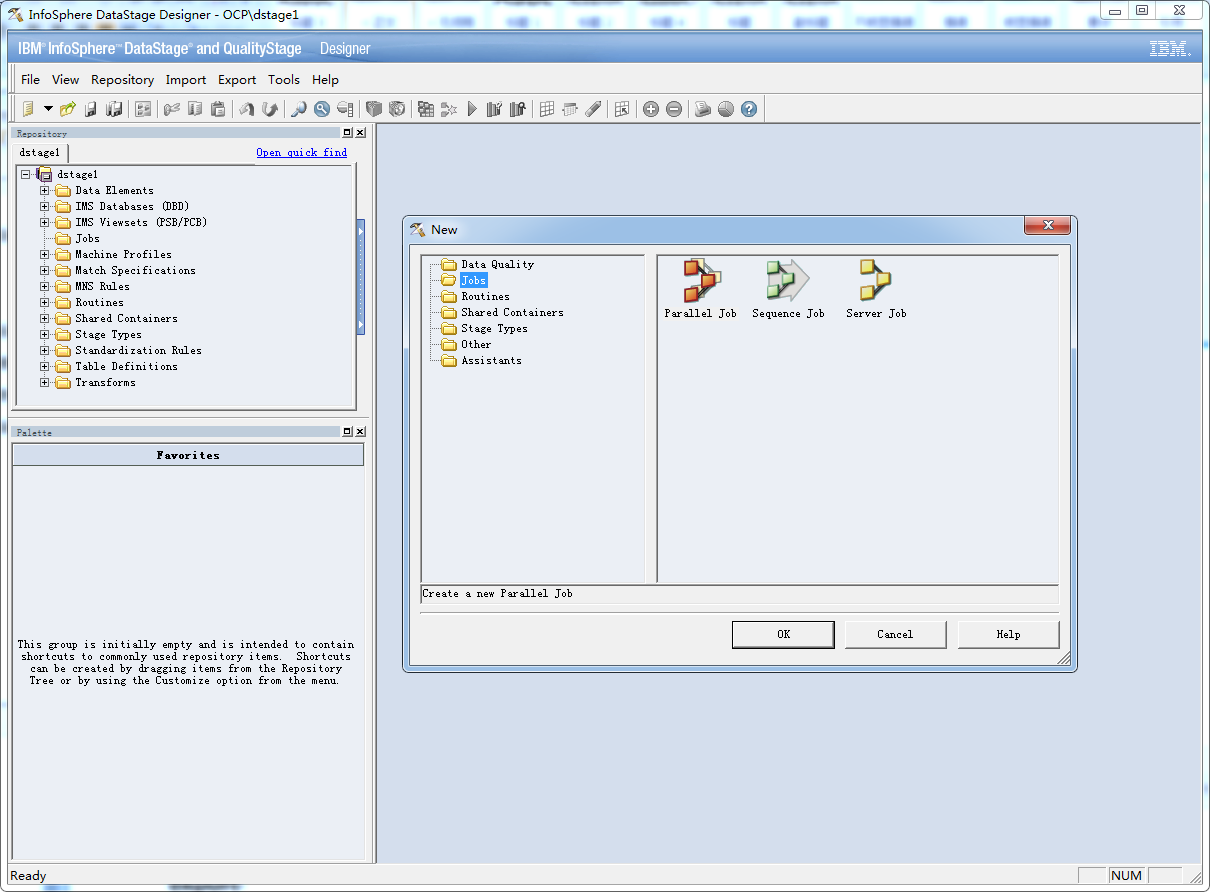
5.5 Datastage 客户端安装
- 1

- 2
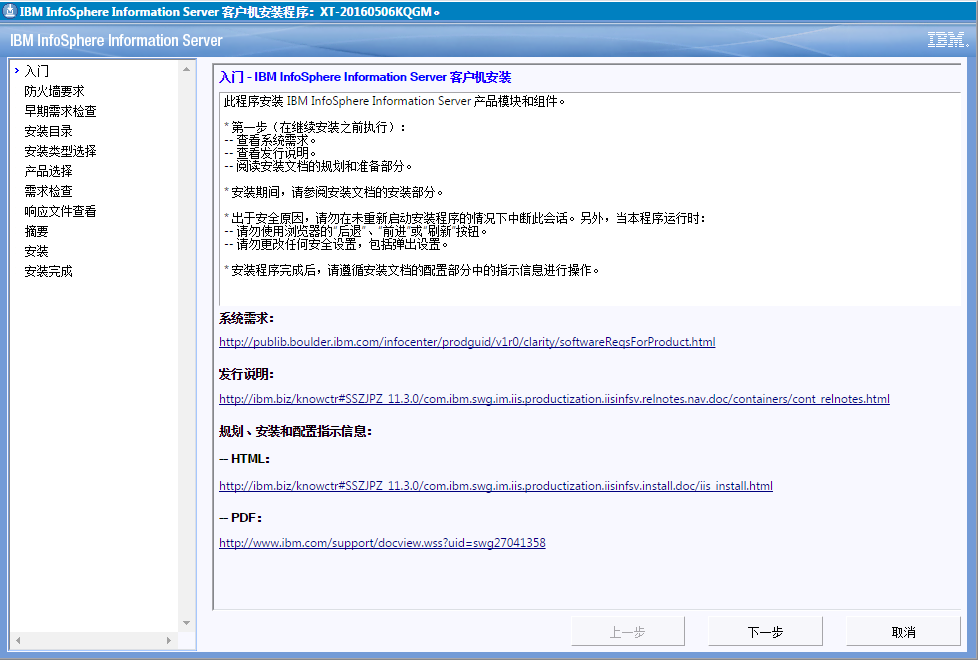
- 3
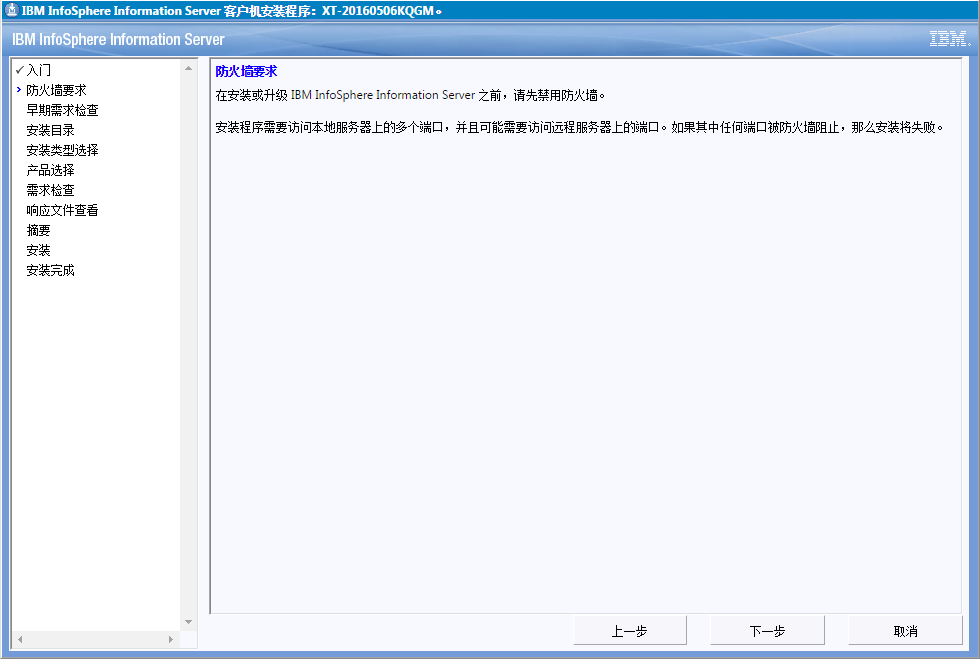
- 4
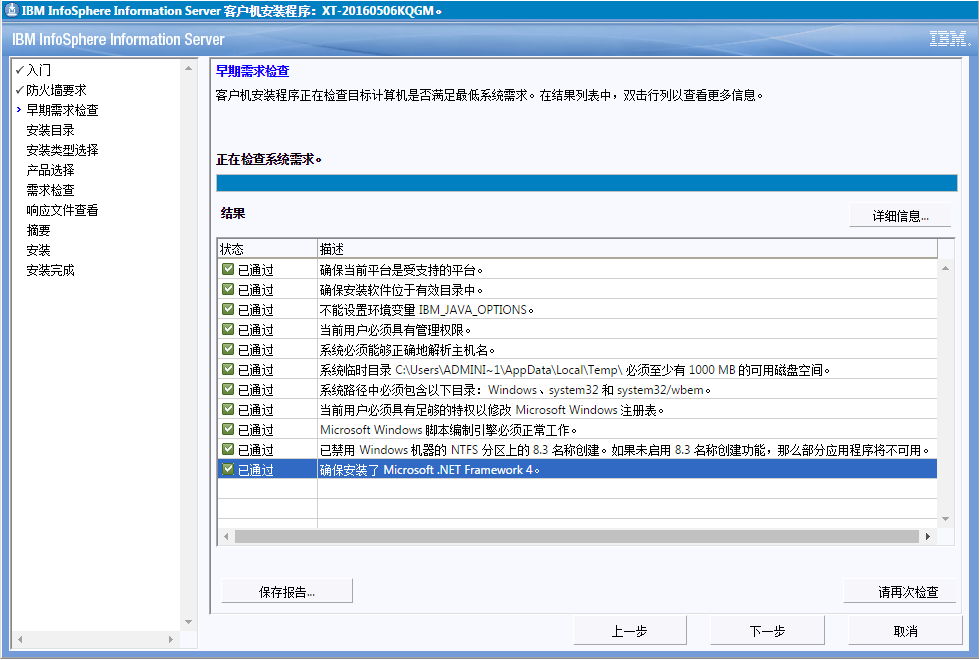
- 5
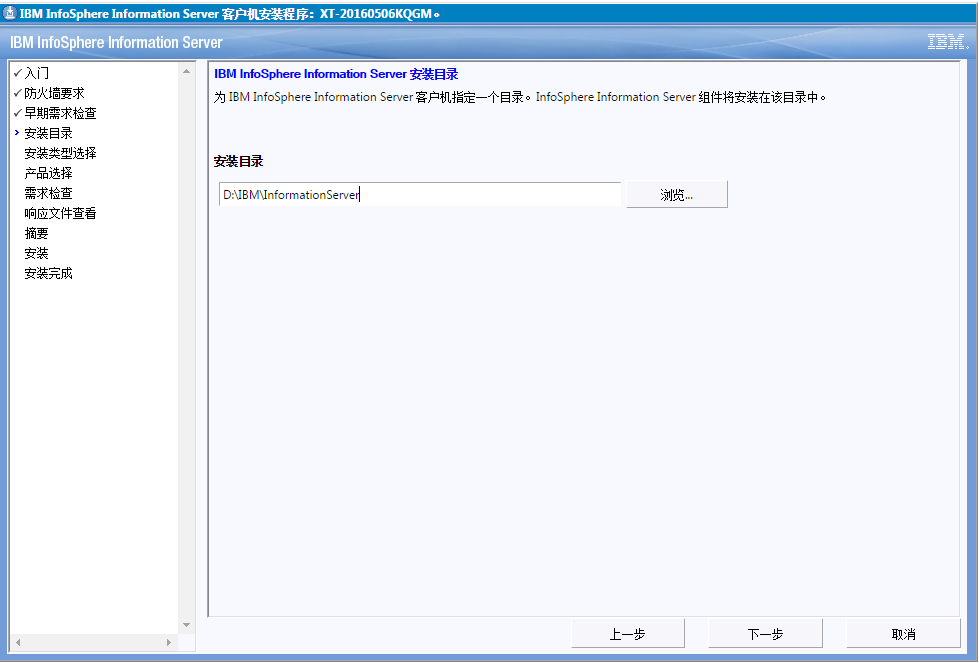
- 6

- 7
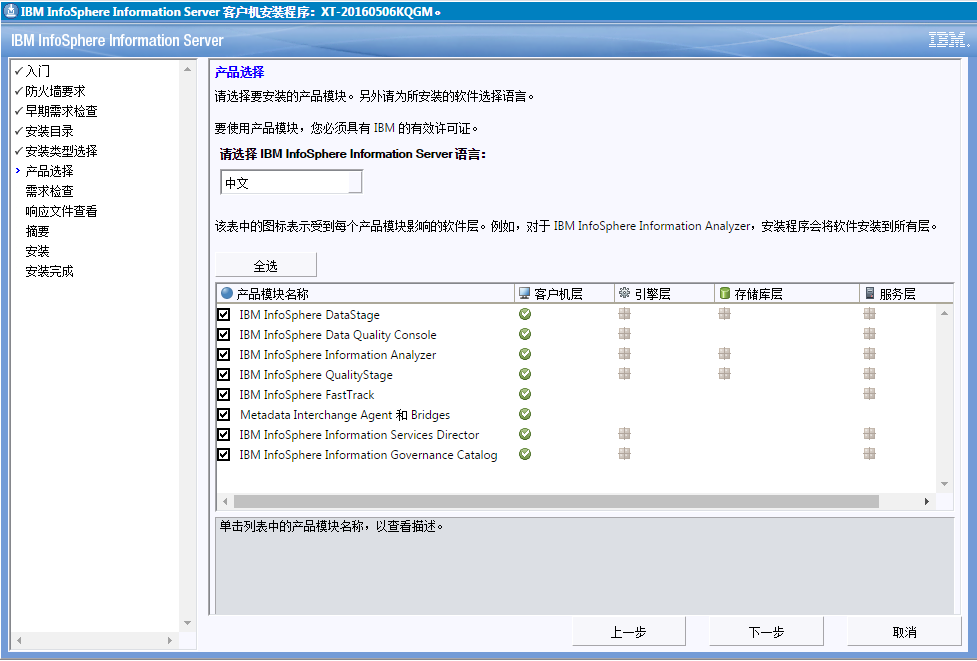
- 8

- 9

- 10
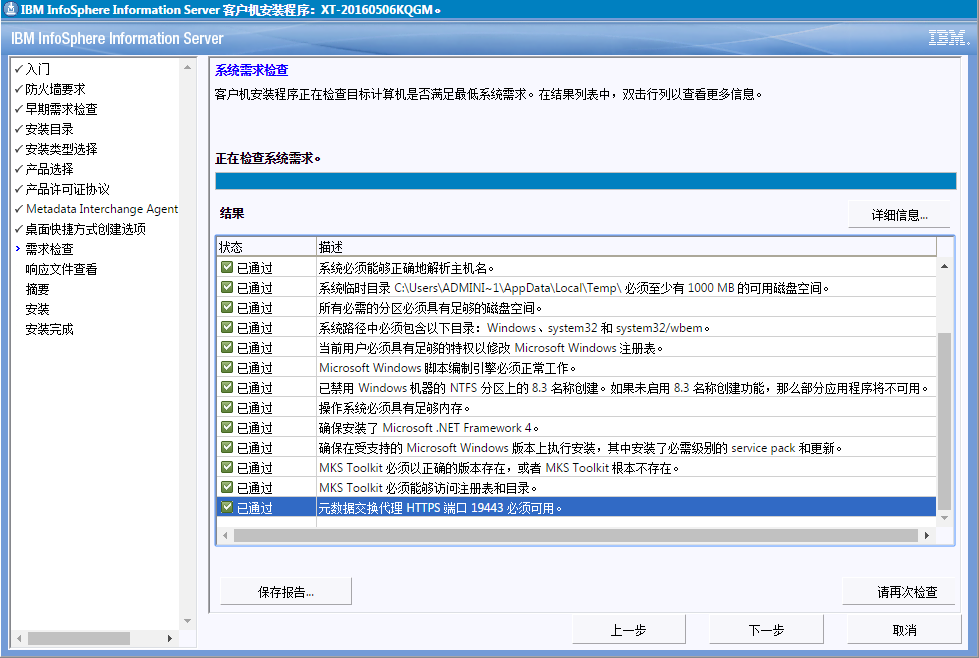
- 11
注意:
客户端windows
c:\Windows\System32\driver\etc\hosts
192.168.1.102 OCP
6.6 验证登录
4.4 启停服务
关闭服务
1.关闭ds

su – dsadm


-sh-4.1$ /opt/IBM/InformationServer/Server/DSEngine/bin/uv -admin -stop

Stopping JobMonApp

JobMonApp has been shut down.

resource_tracker has been shutdown.

Stopping DSAppWatcher

AppWatcher:ALREADY_STOPPED

ResMonApp:STOPPING

ResMonApp:ALREADY_STOPPED

ODBQueryApp:STOPPING

ODBQueryApp:ALREADY_STOPPED

EngMonApp:STOPPING

EngMonApp:ALREADY_STOPPED

DataStage Engine 11.3.0.0 instance "ade" has been brought down.


2.	关闭Node Agents

-sh-4.1$ su - root

Password:

[root@OCP ~]# /opt/IBM/InformationServer/ASBNode/bin/NodeAgents.sh stop

Agent stopped.

AgentService stopped.


3.	关闭WebSphere

[root@OCP ~]# /opt/IBM/WebSphere/AppServer/profiles/InfoSphere/bin/stopServer.sh server1 -username wasadmin -password wasadmin

ADMU0116I: Tool information is being logged in file

           /opt/IBM/WebSphere/AppServer/profiles/InfoSphere/logs/server1/stopServer.log

ADMU0128I: Starting tool with the InfoSphere profile

ADMU3100I: Reading configuration for server: server1

ADMU3201I: Server stop request issued. Waiting for stop status.

ADMU4000I: Server server1 stop completed.
启动服务
- 1 资料库oracle重启时,需要将监听器一起启动,否则,websphere依然无法启动启动命令:lsnrctl start
3.	启动WAS

su - root

[root@localhost bin]# /opt/IBM/WebSphere/AppServer/profiles/InfoSphere/bin/startServer.sh server1

ADMU0116I: Tool information is being logged in file

           /opt/IBM/WebSphere/AppServer/profiles/InfoSphere/logs/server1/startServer.log

ADMU0128I: Starting tool with the InfoSphere profile

ADMU3100I: Reading configuration for server: server1

ADMU3200I: Server launched. Waiting for initialization status.

ADMU3000I: Server server1 open for e-business; process id is 15140

[root@localhost bin]#


4.	启动Node Agents

su – root

[root@localhost bin]# /opt/IBM/InformationServer/ASBNode/bin/NodeAgents.sh start

Starting Agent...

Agent started.


5.	启动ds

su – dsadm

-sh-4.1$ /opt/IBM/InformationServer/Server/DSEngine/bin/uv -admin -start


Checking NLS locale OFF

Checking NLS locale DEFAULT

Checking NLS locale NZ-ENGLISH

Checking NLS locale ZA-ENGLISH

Checking NLS locale GB-ENGLISH

Checking NLS locale IE-ENGLISH

Checking NLS locale US-ENGLISH

Checking NLS locale CA-ENGLISH

Checking NLS locale AU-ENGLISH

Loading NLS map file UNICODE

Loading NLS map file UTF8

Loading NLS map file ISO8859-8-CS

Loading NLS map file ISO8859-9

Loading NLS map file ISO8859-7-CS

Loading NLS map file ISO8859-7+MARKS

Loading NLS map file MS949

Loading NLS map file MS1254-CS

Loading NLS map file PC437

Loading NLS map file MS1251-CS

Loading NLS map file ISO8859-5

Loading NLS map file ISO8859-2

Loading NLS map file ISO8859-5+MARKS

Loading NLS map file MS1250

Loading NLS map file ISO8859-15+MARKS

Loading NLS map file ISO8859-5-CS

Loading NLS map file ISO8859-3-CS

Loading NLS map file ISO8859-9-CS

Loading NLS map file ISO8859-6

Loading NLS map file ISO8859-7

Loading NLS map file MS950

Loading NLS map file ISO8859-2+MARKS

Loading NLS map file MS1255-CS

Loading NLS map file MS950-CS

Loading NLS map file UTF8-CS

Loading NLS map file ISO8859-8+MARKS

Loading NLS map file ISO8859-1+MARKS

Loading NLS map file MS1252

Loading NLS map file MS1252-CS

Loading NLS map file ISO8859-9+MARKS

Loading NLS map file MS936-CS

Loading NLS map file MS936

Loading NLS map file ISO8859-4-CS

Loading NLS map file MS949-CS

Loading NLS map file MS1252+MARKS

Loading NLS map file MNEMONICS

Loading NLS map file PC874-CS

Loading NLS map file ISO8859-1

Loading NLS map file MS1256-CS

Loading NLS map file ISO8859-2-CS

Loading NLS map file MS1251

Loading NLS map file MS1256-WIN2K-CS

Loading NLS map file MS1253-CS

Loading NLS map file ISO8859-6+MARKS

Loading NLS map file ISO8859-8

Loading NLS map file ISO8859-10

Loading NLS map file TIS620-CS

Loading NLS map file ISO8859-3

Loading NLS map file ISO8859-10+MARKS

Loading NLS map file ISO8859-10-CS

Loading NLS map file MS1254

Loading NLS map file MS1253

Loading NLS map file ASCII

Loading NLS map file MS1250-CS

Loading NLS map file MS932

Loading NLS map file MS932-CS

Loading NLS map file ISO8859-15-CS

Loading NLS map file ASCII+MARKS

Loading NLS map file ISO8859-6-CS

Loading NLS map file ISO8859-4

Loading NLS map file ISO8859-3+MARKS

Loading NLS map file MS1255

Loading NLS map file ISO8859-15

Loading NLS map file ISO8859-4+MARKS

Loading NLS map file PC850

Loading NLS map file MS1256-WIN2K

Loading NLS map file ISO8859-1-CS

Loading NLS map file MS1256

68 NLS Character Set Maps loaded in 4055120 bytes.

Loading 9 NLS Locales

9 NLS Locales loaded in 793824 bytes

DataStage Engine 11.3.0.0 instance "ade" has been brought up.

Starting JobMonApp

JobMonApp has been started.

resource_tracker has been started.

Starting DSAppWatcher

-sh-4.1$
5.5 常见问题
1.安装过程检查出错
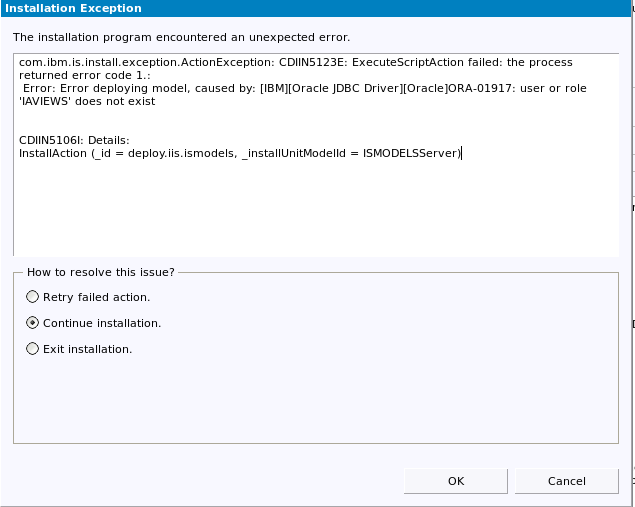
解决方案:
yum install compat-libstdc++-33-3.2.3-61.x86_64

[root@dwtest Packages]# ls |grep "compat-libstdc+"

compat-libstdc++-296-2.96-144.el6.i686.rpm

compat-libstdc++-33-3.2.3-69.el6.i686.rpm

compat-libstdc++-33-3.2.3-69.el6.x86_64.rpm


yum install libgcc.i686    32 bit


[root@dwtest Packages]# ls | grep "libgcc"

libgcc-4.4.7-3.el6.i686.rpm

libgcc-4.4.7-3.el6.x86_64.rpm

[root@dwtest Packages]# rpm -ivh libgcc-4.4.7-3.el6.i686.rpm

warning: libgcc-4.4.7-3.el6.i686.rpm: Header V3 RSA/SHA256 Signature, key ID fd431d51: NOKEY

Preparing...                ########################################### [100%]

   1:libgcc                 ########################################### [100%]


yum install glibc.i686    32 bit

[root@dwtest Packages]# rpm -ivh glibc-2.12-1.107.el6.i686.rpm nss-softokn-freebl-3.12.9-11.el6.i686.rpm

warning: glibc-2.12-1.107.el6.i686.rpm: Header V3 RSA/SHA256 Signature, key ID fd431d51: NOKEY

Preparing...                ########################################### [100%]

   1:nss-softokn-freebl     ########################################### [ 50%]

   2:glibc                  ########################################### [100%]
2.安装报错

解决方案:
[root@dwtest is-suite]# ulimit -n 10240